Water stains and bubbling paint on your walls signal a problem that needs more than just a quick paint job. When water gets behind your paint, it can cause peeling, bubbling, and ugly brown or yellow marks that won’t go away without proper treatment. These issues often point to leaks or moisture problems that need to be fixed first.
The good news is that you can restore your walls after water damage by finding the source of moisture, preparing the damaged area correctly, and using the right primer and paint. Many homeowners make the mistake of painting over water stains without addressing what caused them. This leads to the stains bleeding through the new paint or the damage getting worse.
In this guide, you’ll learn everything you need to know about water damage paint repair.
- How water damage affects painted walls
- Common sources of water damage in homes
- How to identify signs of water-damaged paint
- Steps for restoring water-damaged paint
- How to prevent future water damage paint issues
Keep reading to understand how water damages your walls, how to recognize the warning signs early, and exactly what steps will give you a lasting repair that won’t fail again.
Insights into how water damage affects painted walls
Water damage creates visible problems on painted walls through physical changes to the paint and underlying surfaces. These effects range from cosmetic issues to structural concerns that require immediate attention.
Paint bubbling and peeling causes
Water trapped between your wall surface and paint layer creates bubbles as moisture pushes the paint away from the wall. This happens when water seeps through cracks, leaks, or condensation buildup behind the paint film.
The bubbling process starts small but grows as more water accumulates. Heat exposure makes the problem worse by causing the trapped moisture to expand. When you touch these bubbles, they feel soft and may break easily, releasing water or leaving a damp spot.
Peeling occurs when the bond between paint and wall breaks down completely. Water weakens the adhesion that holds paint to your walls. The paint starts lifting at the edges of bubbles, then curls away from the surface in strips or chips.
Poor surface preparation before painting makes walls more vulnerable to water damage. If the wall was damp during painting or if primer was skipped, water penetrates more easily and causes faster deterioration. For walls already showing peeling, how to repaint fading interior walls covers the surface prep steps that prevent the same failure from repeating.
Discoloration and water stains
Water stains appear as brown, yellow, or gray marks on your painted walls. These stains develop when water carries minerals, dirt, or rust through the wall material. The discoloration spreads outward from the moisture source in irregular patterns.
Fresh water damage creates darker wet spots that may fade as the area dries. However, the staining often remains visible even after the wall dries completely. Repeated exposure to water makes stains darker and more prominent over time.
White or chalky residue can form on painted surfaces when water evaporates and leaves mineral deposits behind. This efflorescence appears as a powdery coating that indicates ongoing moisture problems. The affected paint may also show streaks running down from the water source.
Weakening of wall surfaces over time
Continuous water exposure softens drywall and plaster beneath your paint. You can detect this weakening by pressing on the wall and feeling spongy or soft areas. The wall material loses its structural strength as water breaks down its composition.
Prolonged moisture creates warping and sagging in walls. The surface may bulge outward or develop waves and ripples. In severe cases, sections of drywall can crumble or separate from the wall studs.
Water damage also promotes mold growth inside wall cavities and on painted surfaces. Mold appears as black, green, or brown spots and produces musty odors. This growth further damages paint and wall materials while creating health concerns for your household.
Trends in common sources of water damage in homes
Water damage in homes typically starts in three key areas: roofs that leak into ceilings, pipes hidden inside walls, and moisture that builds up from poor ventilation. Each source creates distinct patterns of damage that affect your paint and interior surfaces.
Roof leaks and ceiling moisture
Roof leaks remain one of the most frequent sources of water damage in homes. Missing shingles, damaged flashing around chimneys, and deteriorating roof materials allow water to seep into your attic and ceiling spaces.
You’ll often notice ceiling water damage as discolored patches, bubbling paint, or sagging drywall. The damage typically appears after heavy rain or snow melt. Water follows roof decking and rafters before dripping onto insulation and ceiling materials.
Older homes face higher risks because roofing materials break down over time. Flat or low-slope roofs are particularly vulnerable to pooling water. Gutters clogged with debris can cause water to back up under roof edges, leading to damage along exterior walls and ceilings near the roofline.
Plumbing leaks inside walls
Hidden plumbing leaks account for a significant portion of water damage claims. These leaks occur in supply lines, drain pipes, and fixture connections concealed behind drywall and inside wall cavities.
You might not detect these leaks until paint starts peeling or walls feel soft to the touch. Water stains often appear as vertical streaks or expanding circles on painted surfaces. The moisture travels along studs and accumulates at the base of walls.
Common plumbing leak locations include:
- Under sinks and behind toilets
- Around shower and tub enclosures
- Behind washing machine connections
- At pipe joints and valve connections
Slow drips cause gradual damage that weakens paint adhesion and promotes mold growth. Supply line leaks create more immediate damage because they release water under pressure. When the damage reaches your living space wall repainting in Norwalk, CT or any nearby area, addressing the leak before repainting is the first and most critical step.
Condensation and humidity buildup
High indoor humidity creates moisture problems even without obvious leaks. Condensation forms on cold surfaces like windows, exterior walls, and uninsulated pipes throughout your home.
Bathrooms and kitchens generate the most moisture from showers, cooking, and appliance use. Without proper ventilation, this humidity saturates painted surfaces and causes paint to peel, crack, or develop a sticky film.
Basements and crawl spaces often have persistent humidity issues. Ground moisture evaporates and rises into living spaces, affecting first-floor walls and painted surfaces. Poor ventilation traps this moisture inside your home, creating ideal conditions for paint failure and mold development.
Tips for identifying signs of water-damaged paint
Water damage leaves clear marks on painted surfaces that you can spot if you know what to look for. Discoloration, texture changes, and moisture buildup are the main indicators that water has compromised your paint and walls.
Yellow or brown ceiling stains
Yellow or brown stains on your ceiling are one of the clearest signs of water damage. These stains appear when water seeps through from above and carries minerals, rust, or dirt that discolor the paint. The stains often have irregular edges and may grow larger over time if the leak continues.
Fresh water stains might look darker or wet around the edges. Older stains tend to be lighter brown or yellow with defined borders. You might notice these ceiling water stains near bathroom fixtures, under roof areas, or around HVAC vents.
The size and color of the stain can tell you about the severity of the problem. Small, light stains might indicate a minor leak, while large, dark stains suggest ongoing water intrusion that needs immediate attention.
Bubbling or cracking paint surfaces
Paint bubbles form when water gets trapped between your wall and the paint layer. The moisture causes the paint to lose adhesion and lift away from the surface, creating small or large raised areas. You’ll see these bubbles most often on walls near water sources like sinks, tubs, or windows.
Cracking paint appears as fine lines or larger breaks in the paint surface. This happens when water causes the drywall to expand and contract, breaking the paint film. The cracks may form patterns or appear random across the damaged area.
Both bubbling and cracking worsen without repair. The paint may eventually peel off completely, exposing bare drywall underneath. For surfaces showing early-stage peeling near trim areas, baseboard painting services in Wilton, CT include the type of careful prep work that stops minor water-related deterioration from spreading to adjacent walls.
Soft or damp drywall texture
Press gently on your wall with your fingers to check for soft spots. Healthy drywall feels firm and solid, but water-damaged drywall gives under light pressure and feels spongy. This happens when water saturates the gypsum core inside the drywall panels.
Damp drywall may feel cool to the touch compared to surrounding areas. You might also detect a musty smell near these spots, which indicates moisture has been present for some time. The texture of the wall surface can change too, feeling rough or degraded instead of smooth.
Soft drywall is a serious issue because it means the structural integrity of your wall is compromised. The moisture also creates conditions for mold growth inside the wall cavity.
Experiences restoring water damage paint
Restoring water-damaged paint requires addressing the root cause first, then properly preparing and refinishing the affected surfaces. Each step builds on the previous one to ensure lasting repairs that prevent future problems.
Identifying and fixing the water source first
You cannot successfully restore water-damaged walls without stopping the water intrusion. Look for signs like discolored patches, peeling paint, or soft spots on your walls and ceilings. Check common problem areas including pipe connections, roof leaks, window frames, and basement walls.
Once you locate the source, fix it immediately. This might mean repairing a leaky pipe, sealing a crack in your foundation, or replacing damaged flashing around your roof. Failing to address the water source means any restoration work will fail again.
Use a moisture meter to check water levels in your walls. The reading should drop below 15% before you start repairs. Document the damage with photos for insurance purposes if needed.
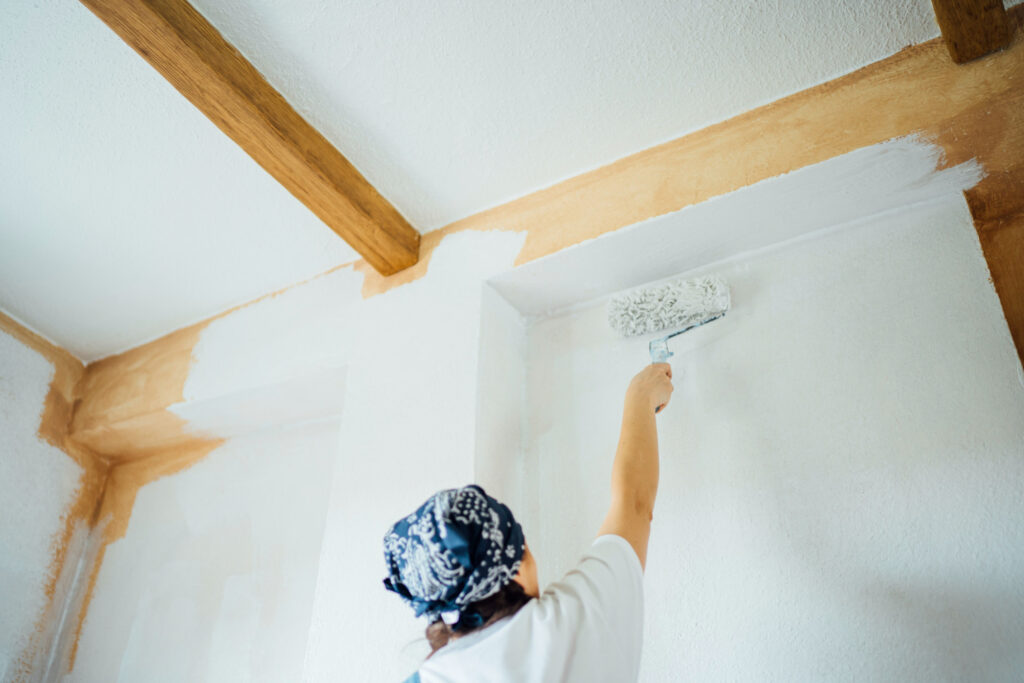
Removing damaged paint and drying surfaces
Strip all loose, bubbling, or peeling paint from the affected area using a scraper or putty knife. Sand the edges where good paint meets damaged sections to create a smooth transition. Remove paint at least 6 inches beyond visible damage to ensure you catch all affected areas.
Dry the surface completely before moving forward. Use fans, dehumidifiers, or open windows to increase air circulation. According to the U.S. Environmental Protection Agency, drying water-damaged areas and items within 24 to 48 hours after a leak or spill will prevent mold growth in most cases, which is why fast action after water intrusion is critical before any repair work begins.
Check for mold growth behind the paint. If you find mold, clean it with a solution of bleach and water (1 cup bleach per gallon of water) or use a commercial mold remover. Wear protective gear including gloves and a mask during this process.
Priming and repainting affected areas
Apply a stain-blocking primer designed for water damage to seal the surface. This prevents old stains from bleeding through your new paint and stops moisture from penetrating the wall. Let the primer dry according to manufacturer instructions, usually 2 to 4 hours.
According to the U.S. EPA, you should never paint or caulk over moldy surfaces. The mold must be cleaned and the surface dried completely before painting, because paint applied over mold is likely to peel. This step is non-negotiable in any water damage repair.
Fill any cracks or holes with spackling compound or joint compound for interior wall restoration. Sand these areas smooth once dry. Apply a second coat of primer if the damage was severe.
Paint the area with two coats of quality interior paint. Match your existing wall color or repaint the entire wall for a seamless finish. Allow proper drying time between coats, typically 4 hours minimum. For a comprehensive approach that covers both prep and finish, following best practices for prep and repair on interior walls ensures no step gets skipped.
Benefits of preventing future water damage paint issues
Stopping water damage before it starts saves you money on repairs and protects your home’s structure. Good ventilation, regular inspections, and the right paint products work together to keep moisture problems away.
Improving ventilation and humidity control
Proper airflow reduces moisture buildup that causes paint to bubble, peel, and crack. You should keep rooms well-ventilated, especially in bathrooms, kitchens, and basements where humidity levels run high. Opening windows during and after showers lets steam escape instead of settling on painted surfaces.
Exhaust fans remove moisture from the air before it damages your walls. Run bathroom fans for at least 20 minutes after showering and kitchen fans while cooking. Dehumidifiers help in damp spaces like basements by pulling excess moisture from the air.
According to the Centers for Disease Control and Prevention, keeping home humidity no higher than 50 percent throughout the day using an air conditioner or dehumidifier is the most reliable step homeowners can take to prevent mold from growing on walls and painted surfaces.
Regular plumbing and roof inspections
Catching leaks early prevents extensive water damage to your painted surfaces. You should inspect your plumbing fixtures, pipes, and connections at the start of each season. Look for water stains, drips, or pooling water under sinks and around toilets.
Your roof needs attention too since leaks often go unnoticed until paint damage appears on ceilings or walls. Check your attic for water stains, dampness, or light coming through the roof. Examine gutters and downspouts to ensure water flows away from your home’s foundation.
Small leaks turn into major problems when ignored. A tiny drip behind a wall can ruin paint and create structural damage over time. Schedule professional inspections if you spot warning signs like discolored paint or musty odors. For walls that have already absorbed moisture damage, living space wall repainting in Norwalk, CT pairs surface restoration with the kind of moisture-resistant finish that holds up through future seasonal changes.
Using moisture-resistant paint products
Water-resistant and waterproof paints create a protective barrier against moisture. These specialized paints include acrylic, latex, oil-based, and epoxy formulas designed for high-moisture areas. They prevent water from seeping through and damaging walls, floors, and other surfaces.
Quality paint and primer products cost more upfront but reduce repair expenses later. They resist peeling and cracking better than standard paints when exposed to moisture, condensation, and steam. Apply these paints in bathrooms, kitchens, laundry rooms, and basements.
Waterproof paint works on various surfaces without breaking down from moisture exposure. However, these paints protect surfaces rather than fix existing structural issues. You need to repair any cracks or leaks before applying moisture-resistant paint for the best results. For rooms that need a complete surface overhaul after water damage, interior painting services in Greenwich, CT deliver the full-service approach that combines proper prep with the right moisture-resistant finish from the start.
Conclusion
Water damage creates serious problems for your painted surfaces. Paint that gets wet will peel, bubble, and crack. You might also see mold growing on your walls.
You need to act fast when water damage happens. The longer you wait, the worse the damage becomes. Your walls can develop permanent stains and structural issues.
When you find water damage on painted surfaces, you cannot simply paint over it. You must fix the source of the water first. Then you need to dry the area completely and remove any damaged paint.
Your painted walls need protection from moisture and humidity. This means checking your home regularly for signs of water intrusion. Look for discoloration, soft spots, or musty odors.
Quality materials make a difference in how well your paint holds up against moisture. Investing in better paint and proper application techniques saves you money on repairs later.
Taking action now protects your home’s appearance and value. Contact Greenhaus today for expert water damage paint restoration and moisture-resistant finishing that keeps your walls protected for years to come.