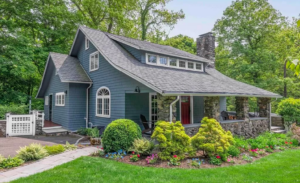
A soft interior wall makeover can completely change how a room feels without major construction or expensive renovations. Soft wall makeovers use gentle colors, subtle textures, and calming finishes to create peaceful spaces that feel both modern and welcoming. This approach works well in any room where you want to reduce visual noise and create a more relaxing atmosphere.
In this article, you’ll learn why soft wall treatments have become a popular choice for homeowners, which color palettes work best for different spaces, how professionals approach the painting process, and when to schedule this type of update for your home.
Here’s what you need to know.
- Why homeowners choose soft interior wall makeovers
- Popular soft color palettes for interior wall makeovers
- Professional interior wall makeover painting process
- Benefits of hiring professional wall makeover painters
- When to schedule a soft interior wall makeover
Keep reading to learn how a soft interior wall makeover can transform your living spaces with minimal disruption and long-lasting results.
Why homeowners choose soft interior wall makeovers
Soft wall treatments create calming spaces that reduce stress and pair well with current design trends. These updates work with your existing furniture while giving rooms a fresh appearance without major construction work.
How gentle wall colors improve living comfort
Soft wall colors create a sense of relaxation in your home. Light beiges, warm grays, and muted whites reflect natural light better than dark colors. This makes your rooms feel larger and more open throughout the day.
These gentle tones help regulate the mood in spaces where you spend the most time. Your bedroom becomes more restful with pale blues or soft greens. Living areas feel more welcoming with warm cream or taupe shades.
Soft tone wall painting also hides minor imperfections better than stark white or bright colors. Small dents and texture variations blend into the background. You spend less time worrying about perfect walls and more time enjoying your space.
The right soft color can make your home feel warmer in winter and cooler in summer. Warm neutrals add coziness to north-facing rooms. Cool soft grays balance out spaces with lots of afternoon sun.
Reducing visual stress with neutral interior tones
Your eyes need breaks from harsh contrasts and bright colors. Neutral wall tones provide visual rest between furniture, artwork, and decorative items. This reduces eye fatigue when you spend hours in the same room.
Benefits of neutral walls:
- Lower mental stimulation for better focus
- Easier transition between different rooms
- Less color clash with changing decor
- Better background for video calls and photos
Neutral walls let you change accessories and furniture without repainting. Your blue couch works today, and your future green chairs will work tomorrow. The walls stay flexible as your style evolves.
These tones also help when multiple people share a space. Everyone has different color preferences, but most people find neutral walls acceptable. This makes decorating shared homes much simpler.
Matching soft wall designs with modern furniture
Modern furniture styles rely on clean lines and simple shapes. Soft wall colors complement these pieces without competing for attention. Your sleek sofa or minimalist table becomes the focal point instead of fighting with busy walls.
Contemporary furniture often features natural materials like light wood and linen. Soft beige or greige walls enhance these textures rather than clash with them. The overall look feels cohesive and intentional.
You can mix furniture styles more easily against neutral backgrounds. Your modern chair sits comfortably next to a vintage side table when both rest against soft gray walls. The walls become the unifying element.
| Furniture style | Best soft wall tones |
| Scandinavian | Soft white, light gray |
| Mid-century modern | Warm beige, pale taupe |
| Minimalist | Cool gray, off-white |
| Transitional | Greige, warm gray |
When a wall makeover refreshes your home style
You notice when your walls start looking dated compared to current trends. Yesterday’s popular colors can make your entire home feel stuck in the past. A soft wall makeover updates your space without following extreme trends that quickly look outdated.
Wall updates cost less than replacing furniture or renovating. You get a significant visual change for a fraction of major remodel expenses. Most rooms need just a weekend and some paint to transform completely.
Life changes often call for wall updates. New family members, remote work setups, or empty nesting shift how you use your space. Fresh soft walls mark these transitions and help rooms serve their new purposes better.
Your walls show wear over time from daily life. Marks from furniture, fading from sunlight, and general aging become obvious. A makeover restores the fresh feeling you had when you first moved in.
Popular soft color palettes for interior wall makeovers
Soft color palettes transform rooms into peaceful spaces that feel both modern and timeless. These gentle shades work with different design styles while creating a calm backdrop for your furniture and decor.
Warm beige, cream, and light sand tones
Warm neutrals bring comfort to any room without overwhelming your senses. Beige tones range from barely-there hints of tan to deeper caramel shades that add warmth. Cream colors offer a softer alternative to stark white while still keeping rooms bright and open.
Light sand tones work well in living rooms and bedrooms where you want a cozy feel. These colors pair naturally with wood furniture, wicker baskets, and linen fabrics. You can use different shades from the same color family to create depth without adding bold contrasts.
Best uses for warm neutrals:
- Main living spaces that get natural light
- Bedrooms where you want a restful atmosphere
- Hallways and entryways for a welcoming feel
These shades also make small rooms appear larger because they reflect light gently. You can layer them with whites and deeper browns to add visual interest.
Soft gray and minimalist modern shades
Gray has become a go-to choice for modern interior wall color design. Soft grays range from cool silver tones to warmer greige options that blend gray and beige. These colors create clean backgrounds that let your furniture and artwork stand out.
Light charcoal grays add sophistication without the heaviness of darker colors. You can use them on accent walls or throughout entire rooms. They pair well with white trim, black fixtures, and metallic accents like brushed nickel or brass.
Greige tones offer flexibility because they shift between warm and cool depending on your lighting. Morning sunlight might bring out beige undertones while evening light emphasizes the gray. This adaptability makes them practical for rooms that serve multiple purposes.
Popular gray combinations:
- Pale gray walls with crisp white ceilings
- Greige throughout with one darker accent wall
- Light gray paired with natural wood elements
Pastel blue and subtle green interior styles
Pastel blues bring the calming qualities of water and sky indoors. Light blue shades work particularly well in bedrooms, bathrooms, and laundry rooms. These colors reduce stress and create peaceful environments where you can relax.
Mint green and sage offer earthy alternatives that connect to nature. These greens pair beautifully with white, cream, and natural materials like stone or wood. Seafoam blue-greens bridge both color families and add a fresh, coastal feel.
You can use these colors in kitchens to create bright, clean spaces. They also work in living areas when you want color without intensity. Pastel shades stay soft enough to avoid overwhelming smaller rooms while adding personality.
Off-white and natural light reflective finishes
Off-white shades include ivory, ecru, and alabaster tones that offer warmth without the starkness of pure white. These colors maximize natural light by bouncing it around your rooms. They create bright spaces that still feel soft and inviting.
Light reflective finishes in off-white work especially well in rooms with limited windows. The subtle warmth prevents the cold feeling that pure white sometimes creates. You can use these shades on all walls or combine them with slightly deeper neutrals for contrast.
Benefits of off-white finishes:
- Makes rooms appear larger and brighter
- Provides a neutral backdrop for any decor style
- Hides minor wall imperfections better than stark white
- Works with both warm and cool accent colors
These shades complement any furniture style from traditional to contemporary. They also transition well between rooms, creating flow throughout your home.
According to the U.S. General Services Administration’s design guidelines, light-reflective interior finishes in soft neutral tones improve occupant comfort and reduce reliance on artificial lighting in residential and commercial spaces alike. Selecting high-LRV paints for rooms with limited windows is a practical and energy-conscious choice.
Professional interior wall makeover painting process
A residential wall makeover painting project follows a structured approach that ensures lasting results. Each step builds on the previous one, from removing dirt and fixing damage to applying primer and paint with careful attention to detail.
Surface cleaning and minor wall repair
Clean walls are essential for paint to stick properly. Use a damp sponge with mild detergent to remove dust, grease, and fingerprints from your walls. Pay extra attention to areas around light switches and door frames where oils from hands accumulate.
Let the walls dry completely before moving to repairs. Fill small holes and cracks with spackling compound using a putty knife. For larger damaged areas, you may need joint compound applied in thin layers.
Sand the repaired spots smooth once they dry completely. Use fine-grit sandpaper and make gentle circular motions. Wipe away dust with a damp cloth before painting.
Check for any remaining imperfections by running your hand across the wall. Fix any rough spots you find now rather than after painting begins.
Applying primer for smooth color blending
Primer creates an even base that helps your new paint color look consistent across the entire wall. This step is especially important when you’re covering dark colors or working with fresh repairs.
Use a roller for large wall sections and a brush for edges and corners. Apply primer in a thin, even coat using a “W” pattern with your roller. This technique helps distribute the primer without leaving roller marks.
Key primer benefits:
- Seals porous surfaces
- Hides previous paint colors
- Reduces the number of paint coats needed
- Improves paint adhesion
Allow primer to dry for the time listed on the container, typically 2-4 hours. Some primers require overnight drying for best results.
Precision painting for soft, even coverage
Start by cutting in the edges with a quality angled brush. Paint a 2-3 inch border around corners, ceiling lines, and trim before using your roller.
Load your roller evenly without oversaturating it. Roll in overlapping “W” or “M” patterns to spread paint smoothly. Work in 3-4 foot sections to maintain a wet edge and avoid visible lap marks.
Apply thin coats rather than one thick coat. Two thin layers provide better coverage and a more professional appearance than one heavy application. The first coat may look streaky, which is normal.
Let each coat dry completely before applying the next one. Most paints need 2-4 hours between coats, though some require longer drying times.
Final quality check and detail touch-ups
Inspect your work in both natural daylight and artificial light. Different lighting reveals different imperfections like thin spots, drips, or missed areas.
Use a small brush to fix any mistakes you find. Blend touch-ups carefully into the surrounding paint while the edges are still slightly wet. This prevents visible patch marks.
Check corners and edges where walls meet trim or ceilings. These areas often need additional attention. Remove any paint from trim or surfaces where it doesn’t belong using a damp cloth while still wet.
Let the final coat cure for at least 24 hours before moving furniture back or hanging items on the walls.
Benefits of hiring professional wall makeover painters
Professional painters deliver smooth, even results while protecting your home and cutting down project time. They use the right tools and materials to create finishes that last years longer than typical DIY attempts.
Achieving consistent color texture across walls
Professional painters know how to apply paint evenly without streaks, drips, or patches. They use specific brush and roller techniques that create uniform coverage from ceiling to floor. When you hire an interior wall makeover service, you avoid common problems like visible roller marks or inconsistent sheen.
Professionals also understand how lighting affects wall color. They account for natural light, shadows, and artificial lighting to make sure your walls look consistent throughout the day. This expertise prevents the frustration of noticing color variations after the job is done.
Key factors professionals control:
- Paint thickness: they apply the right amount per coat
- Drying time: they wait proper intervals between coats
- Application method: they match tools to wall texture
- Temperature: they work in ideal conditions for paint curing
Experts blend paint at edges and corners so you never see where one section ends and another begins. They prepare surfaces properly by filling holes, sanding rough spots, and priming when needed. This prep work makes the difference between paint that looks good and paint that looks flawless.
Protecting furniture and interior surfaces
Professional painters cover and shield everything in your home before starting work. They use drop cloths, plastic sheeting, and protective tape to keep paint off floors, furniture, fixtures, and trim. You won’t find paint splatters on your hardwood floors or doors when they finish.
Painters move furniture away from walls and group items in room centers under protective covering. They remove switch plates, outlet covers, and door hardware to paint around them cleanly. They also protect door frames, baseboards, and crown molding with precision masking tape.
Their careful approach extends to your HVAC system and belongings. Professionals seal off vents to prevent paint particles from entering your air ducts. They know which household items need to be removed from the room entirely and which can stay under protection.
Faster project completion with expert tools
Professional painters own commercial-grade sprayers, high-quality brushes, extension poles, and scaffolding that speed up work significantly. They complete in days what might take you weeks. An interior wall makeover service brings everything needed to work efficiently without multiple trips to the hardware store.
Their tools produce better results in less time. Professional sprayers create smooth finishes on large walls faster than rollers while using less paint. Quality brushes hold more paint and release it evenly, reducing the number of coats needed.
Painters work in teams to tackle multiple rooms or large spaces at once. While one person cuts in edges and trim, another rolls main wall sections. This coordination keeps the project moving without sacrificing quality.
Long-lasting paint protection
Professional painters use premium paints and application methods that help your walls resist damage for years. They apply proper primer coats that seal surfaces and help topcoats adhere strongly. This foundation prevents peeling, bubbling, and premature wear.
Experts apply the correct number of coats for durability. Most professional jobs include primer plus two finish coats, creating a protective barrier that withstands cleaning, humidity, and daily contact. They also know which paint types work best in different rooms based on moisture levels and traffic.
Quality application techniques prevent future problems. Professionals ensure complete drying between coats, which stops paint from cracking as it cures. They use proper ventilation to help paint cure correctly, and they apply even layers that won’t sag or run over time. Your walls maintain their fresh appearance longer because the paint bonds properly to the surface from day one.
When to schedule a soft interior wall makeover
Planning your wall refresh at the right time helps you get better results and avoid extra work. The best moments usually connect to other home changes, visible wall problems, or when you want to boost your home’s value.
Before home renovation or redesign projects
Starting with fresh walls before you renovate other parts of your home saves time and protects your new investments. When you paint first, you don’t have to worry about splatters on new flooring or furniture.
Schedule your soft interior wall makeover before installing new cabinets, countertops, or built-ins. This order lets painters work freely without taping off expensive new surfaces. You also avoid the need to touch up walls around fresh installations.
If you’re planning to update multiple rooms, paint the walls before moving furniture back in. Empty or partially empty spaces give you cleaner lines and better coverage. The paint also needs time to cure fully before you place items against the walls.
When walls show fading or aging paint
Faded or worn paint signals it’s time for a refresh. Most interior walls need repainting every 5-7 years in normal conditions, but high-traffic areas may show wear sooner.
Look for these signs:
- Colors that appear dull or uneven
- Paint that feels chalky when touched
- Small cracks or peeling in corners
- Stains that won’t wash off
- Visible scuff marks that cleaning doesn’t remove
Rooms with lots of natural light fade faster than darker spaces. South-facing walls often lose their color intensity within 3-4 years. Acting when you first notice fading prevents the problem from spreading and keeps your home looking maintained.
After lighting or furniture updates
New lighting fixtures or furniture arrangements can make existing wall colors look outdated or mismatched. A home interior refresh painting project helps your walls complement these updates.
Changed lighting affects how paint colors appear throughout the day. What looked warm and inviting under old fixtures might seem dull or too bright with new ones. Testing paint samples under your current lighting prevents surprises.
When you rearrange furniture, you might see untouched sections of wall that don’t match the faded areas. Fresh paint creates a uniform backdrop that makes your new layout look intentional and complete.
To improve home market appeal in Greenwich, Connecticut
Fresh walls significantly impact how buyers view your Greenwich home. Clean, neutral paint makes spaces feel larger and better maintained.
Homes with recently painted interiors typically sell faster and closer to asking price. Buyers see updated walls as one less task they need to handle after purchase. Neutral colors like soft whites, warm grays, and light beiges appeal to the widest range of preferences.
According to the U.S. Department of Housing and Urban Development, well-maintained interior surfaces contribute directly to a home’s habitability and market readiness. Fresh, neutral paint is consistently cited as one of the lowest-cost, highest-impact updates sellers can make before listing.
Schedule your wall makeover 2-3 weeks before listing your property. This timing allows paint to cure completely and any odors to dissipate. Professional staging works best against freshly painted walls that don’t distract from your home’s features.
In Greenwich’s competitive market, small details matter. Crisp wall edges, consistent color, and touch-ups around fixtures show buyers that you’ve cared for the entire property.
Conclusion
A soft interior wall makeover is one of the most practical ways to change how your home feels without committing to a full renovation. This guide has covered why soft tones work better than bold colors for most living spaces, which palettes suit different rooms and furniture styles, how professionals execute the process, and when to plan your update for maximum impact.
The difference between a rushed DIY project and a professionally executed makeover shows in the details: consistent sheen across large wall surfaces, clean lines at ceilings and trim, and paint that holds up to cleaning and daily contact for years rather than months.
According to the Environmental Protection Agency, low-VOC interior paints significantly reduce airborne chemical compounds after application, making them the preferred choice for bedrooms, nurseries, and rooms with limited ventilation. Professional painters familiar with current product lines can recommend formulations that balance durability with indoor air quality.
Whether you are refreshing a single room or updating your entire home before listing, the investment in quality materials and skilled application pays off through better appearance and longer paint life.
When you’re ready to take the next step, Greenhaus Painting is here to help you get the job done right.