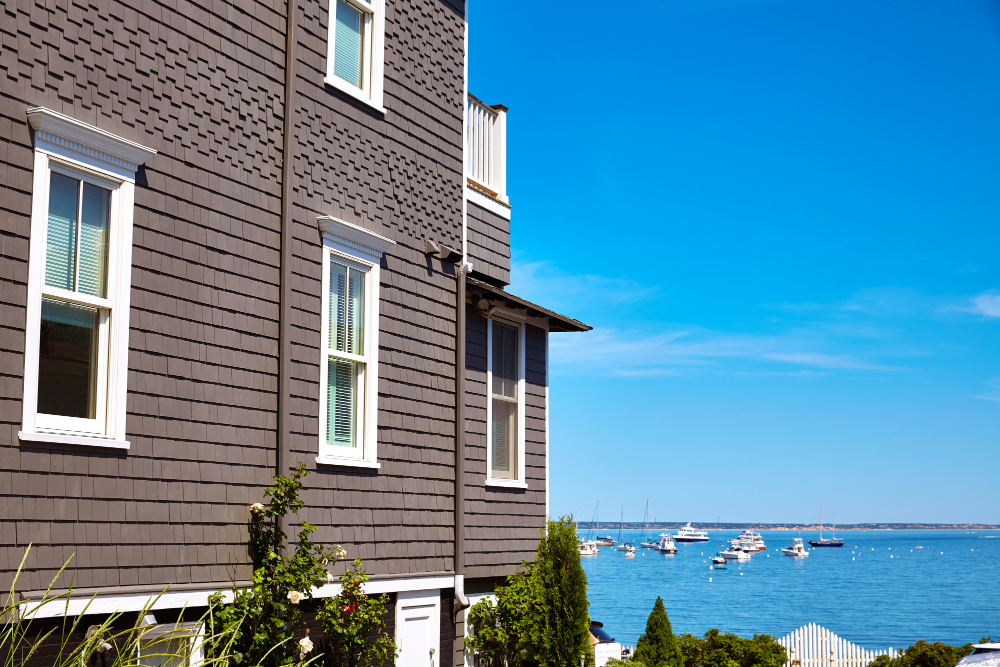
Owning a home along the Fairfield County shoreline means living with a set of conditions that most exterior paint was never designed to handle. Salt-laden air rolls off Long Island Sound and coats every surface it touches. Humidity keeps siding damp longer than it should be. UV exposure beats down on south-facing walls for hours each day. And all of that happens on top of the same freeze-thaw cycling that stresses every Connecticut home through winter.
The result is that exterior paint on shoreline homes in Greenwich, Darien, Westport, Norwalk, and Stamford fails faster than paint on identical homes just a few miles inland. What might last eight to ten years on a home in Ridgefield or Newtown can start peeling and chalking within three to five years on a waterfront property. That difference is not about the painter or the paint. It is about the environment, and beating it requires a specific approach to products, preparation, and maintenance.
According to NOAA’s State Climate Summary for Connecticut, the state’s coastal location exposes it to both the moderating and moistening influence of the Atlantic Ocean and the effects of hot and cold air masses from the continent’s interior. That combination produces the humid summers, salt exposure, and seasonal temperature swings that define the challenge for shoreline homeowners trying to keep their exteriors protected.
In this article, you will learn about:
- What salt air, UV radiation, and coastal humidity actually do to painted surfaces
- Which siding materials and surfaces break down fastest near the water
- How to tell whether your paint is already failing from coastal exposure
- The products and primer systems that hold up in a marine environment
- Why surface preparation matters even more on shoreline homes
- A maintenance schedule that extends the life of your coastal paint job
Keep reading to understand what your shoreline home is up against and how to build a paint system that actually lasts in the conditions Fairfield County’s coast delivers.
What salt air, UV, and humidity do to your exterior paint
The Connecticut shoreline is not a single threat. It is three threats working together, each one making the others worse. Salt corrodes and weakens the paint film. UV radiation breaks down the chemical bonds that hold the coating together. And high humidity keeps surfaces wet long enough for moisture to penetrate any crack or weakness the other two have created. Understanding how each one operates, and how they compound one another, explains why coastal paint jobs fail so much faster than inland ones.
This is not a matter of buying better paint and hoping for the best. Each of these environmental stressors attacks the paint system in a different way, and the combination demands a coordinated response across product selection, surface preparation, and ongoing care.
The science behind this is well documented, and knowing it puts you in a much better position to evaluate what your contractor recommends and why.
Salt deposits act like sandpaper on your paint film
Salt does not just sit on your siding. It actively damages the coating beneath it. When salt spray from Long Island Sound settles on a painted surface, it forms a crystalline film as the water evaporates. Those crystals are hygroscopic, meaning they attract and hold moisture from the surrounding air. This creates a persistent damp layer on the paint surface that would otherwise dry between weather events.
Over time, the cycle of salt deposit, moisture retention, and partial drying degrades the paint film from the outside in. The salt crystals themselves are abrasive at a microscopic level, and the moisture they hold softens the paint binder and allows it to break down faster. The visible symptoms include chalking, where the surface develops a powdery residue that rubs off on your hand, and premature fading, where colors lose their depth well before the paint’s expected lifespan.
The effects are most severe within one to three miles of the shoreline, and they intensify on elevations facing the water or exposed to prevailing winds. Homes in Stamford and Norwalk that sit close to Long Island Sound experience noticeably faster paint degradation than homes just a few blocks further north, even on the same street. The difference is salt load, and it is measurable. A home in Trumbull or Monroe, just a few miles north, faces a fraction of that exposure.
UV radiation breaks down the chemistry of the coating
Sunlight is a slow destroyer. The ultraviolet component of sunlight penetrates the paint film and degrades the organic compounds in the binder, the resin that holds the pigment particles in place and bonds the coating to the surface. As the binder breaks down, pigment particles are released from the surface, which is the physical process behind chalking. The paint also loses flexibility, becoming brittle and more prone to cracking.
Darker colors absorb more UV energy and degrade faster than lighter ones. This is why a deep navy blue on a south-facing wall near the coast may need repainting years before a lighter shade on the same house. Choosing the right paint color for a coastal home is not just an aesthetic decision. It directly affects how long the coating holds up under UV stress.
South and west-facing walls take the heaviest UV load in Fairfield County, receiving direct afternoon sun for extended periods during spring and summer. These are the walls that show chalking and fading first, and they are often the same walls most exposed to salt spray from the Sound. When UV and salt work the same surfaces simultaneously, the damage accelerates faster than either threat would produce on its own.
Humidity keeps the damage cycle going around the clock
Connecticut’s coastal climate features average summer humidity levels that keep exterior surfaces damp far longer than they would be in a drier inland location. The EPA recommends keeping indoor humidity below 60 percent to prevent mold and moisture problems, and outdoor humidity along the Sound regularly exceeds that threshold for weeks at a time during summer.
For painted surfaces, sustained high humidity means the paint film rarely gets a chance to fully dry between rain events, dew cycles, and fog exposure. Moisture that penetrates hairline cracks, seams, or areas of adhesion loss stays trapped longer, which gives it more time to soften the paint, attack the wood beneath, and create conditions where mildew and biological growth can take hold on the coating surface.
Mildew on exterior paint is more than a cosmetic issue. It is a living organism that feeds on the organic components of the paint binder and the moisture it holds. Left untreated, mildew growth creates dark staining that is difficult to remove without scrubbing or power washing, and the patches it covers are often areas where the paint film has already been weakened by moisture intrusion. The combination of persistent humidity, salt deposit, and UV degradation creates a reinforcing cycle where each factor opens the door for the next, and the paint deteriorates faster with each passing season.
Which surfaces and materials break down first
Not every part of your home’s exterior faces the same level of coastal stress. Some surfaces, materials, and orientations are hit much harder than others, and understanding where damage tends to show up first lets you direct inspection and maintenance to the areas that need it most.
The pattern is consistent across shoreline homes in Fairfield County. Surfaces that face the water, catch the most sun, or trap moisture are always the first to show signs of paint failure. And some siding materials handle salt air far better than others, which matters when you are choosing how to protect or repair your exterior.
Knowing your home’s specific vulnerabilities helps you plan smarter, spend less on repairs over time, and communicate more effectively with your painting contractor about what the project actually requires.
Wood siding and trim in a salt environment
Wood is the most common exterior material on older Fairfield County homes, and it is also the most reactive to coastal conditions. The USDA Forest Products Laboratory has documented how salt uptake into wood causes physical disruption of the wood fibers, a process that compounds the normal moisture cycling that already stresses wood siding in any climate.
Salt attracts and holds moisture against the wood surface, which keeps the wood in a perpetual cycle of swelling and partial drying. That cycle stresses the paint film, breaks adhesion, and eventually opens pathways for deeper moisture penetration. Once water reaches the wood substrate beneath the paint, the conditions for rot and biological deterioration are set.
The areas that fail first are predictable.
- Trim boards and window casings, especially horizontal surfaces that hold standing water and salt deposits
- The bottom edges of clapboard siding where water runs down and pools before evaporating
- End grain at cut edges and joints, which absorbs moisture and salt at many times the rate of flat grain
- Fascia and soffit areas where roof runoff concentrates salt and moisture
Wood siding on a shoreline home may need repainting every four to six years to maintain its protective barrier, compared to seven to ten years for a similar home inland. The difference is the compounding effect of salt, moisture, and UV working together on every surface.
How different siding types handle the coast
Not all exterior materials respond to salt air the same way, and the siding on your home determines what kind of paint system and maintenance schedule you need.
Fiber cement siding resists salt corrosion, rot, and insect damage far better than wood. It does not absorb moisture the way wood does, which eliminates the swelling and contracting cycle that breaks paint adhesion. Paint on fiber cement in a coastal environment tends to last significantly longer than paint on wood, though it still requires a quality coating and proper prep to resist UV and salt-driven chalking.
Vinyl siding does not need paint, but it is not immune to coastal damage. Salt film builds up on the surface over time, attracting dirt and dulling the color. UV exposure also degrades vinyl, making it brittle after years of direct sun. Vinyl that has become chalky or discolored can sometimes be restored with cleaning rather than replacement, but older panels exposed to decades of salt and sun may need to be replaced.
Masonry and stucco handle salt differently than wood. Salt deposits on masonry can cause efflorescence, a white crystalline deposit that appears on the surface as moisture moves through the masonry and evaporates. Paint over masonry with active efflorescence will fail quickly because the salt crystals push the coating off the surface from behind. Any masonry painting project near the coast must address moisture management and salt removal before coating.
Cedar shingles, common on many Darien and Westport homes, deserve specific attention. Cedar is naturally resistant to rot, but salt exposure changes the equation. Salt prevents coatings from bonding properly, so cedar shingles near the shore need thorough washing with fresh water before any stain or paint application.
Water-facing walls versus sheltered elevations
The side of your home that faces Long Island Sound takes the most abuse. Wind carries salt spray directly onto those surfaces, and prevailing winds in coastal Fairfield County typically push moisture-laden air from the southwest during summer months. A water-facing wall may accumulate several times more salt deposit than a sheltered elevation on the same house.
This asymmetry shows up clearly in paint condition. Homeowners in Norwalk and Stamford often notice that their south or southwest-facing walls need attention years before the north-facing side shows any problems. The combination of direct salt spray, UV exposure, and wind-driven rain creates a dramatically harsher environment on the exposed side.
A smart approach to coastal exterior painting accounts for this difference rather than treating the whole house identically. The water-facing elevations may warrant a heavier coating system, more aggressive primer, or a shorter maintenance interval than the sheltered sides. Some contractors recommend applying an additional topcoat on the most exposed walls to build a thicker protective barrier where the stress is greatest.
Understanding your home’s orientation relative to the water helps you plan maintenance, budget for repairs, and have an informed conversation with your painting contractor about where to invest the most care. A walk-around inspection in early spring, paying close attention to the side facing the Sound, catches problems while they are still small.
How to tell if your coastal paint is already failing
Paint failure on a shoreline home does not always look the same as failure on an inland property. The salt and moisture environment produces some distinct symptoms that are easy to spot once you know what to look for. Catching these signs early is the difference between a manageable touch-up and a full exterior repaint.
An annual inspection, ideally in late spring after winter has passed and before the humid months begin, is the best time to walk your home’s exterior and assess the condition of the coating. Focus on the areas identified in the previous section, but inspect all four sides, because damage can develop anywhere moisture finds a foothold.
The following symptoms each indicate a specific kind of coastal paint failure, and recognizing them helps you communicate what you are seeing to your contractor and understand the repair approach they recommend.
Chalking and color fade that seems too early
Chalking is the most common first sign of coastal paint failure. Run your hand across the siding or trim. If a white or colored powder transfers to your palm, the binder in the paint has begun to break down and release its pigment particles. A mild amount of chalking over many years is normal for any exterior paint, but heavy chalking within the first three to five years of a paint job signals that the coating was not formulated to handle your level of UV and salt exposure.
Color fade that appears dramatically faster on one side of the house than the other is also a coastal indicator. If the water-facing elevation looks noticeably duller or lighter than the opposite side, the combination of UV and salt is degrading the paint at an accelerated rate on that exposure.
Neither chalking nor fading means the paint has failed entirely. If the underlying adhesion is still sound, a thorough wash followed by a quality topcoat can restore protection. But if chalking has progressed to the point where the paint feels thin or the primer is visible beneath, the coating needs to be removed and rebuilt from primer up.
Blistering and peeling near windows, trim, and joints
Blisters on coastal homes form when moisture trapped beneath the paint film cannot escape. Salt deposits on the surface hold moisture against the coating, while humidity prevents the surface from drying. Water migrates through any weakness in the film, collects between the paint and the substrate, and pushes outward as it warms.
Peeling near windows, doors, and trim is especially common on shoreline properties because these are the areas where caulk joints, flashing, and seams are most likely to admit moisture. Failed caulk around a window frame allows salt-laden rain to penetrate behind the trim, where it wets the wood and breaks the paint bond from behind. The peeling you see on the face of the trim is often the symptom of a moisture problem that originated at a joint or edge.
On exterior brick that has been painted white or another color, blistering may indicate active efflorescence. Salt is migrating through the masonry and pushing the paint off from behind. In this case, repainting without addressing the moisture source will produce the same failure within a season or two.
Mildew, dark staining, and biological growth on the surface
Mildew thrives in the exact conditions that coastal Fairfield County delivers. Warm temperatures, persistent humidity, shade from trees or neighboring structures, and a paint surface weakened by salt and UV create an ideal environment for biological growth. Dark green, gray, or black patches on the paint, especially on north-facing walls and shaded areas, are almost always mildew.
Power washing or scrubbing with a mildew-killing solution removes the growth, but it does not fix the underlying conditions that allowed it to appear. If the paint film is still intact beneath the mildew, cleaning and applying a mildewcide-treated topcoat can restore protection. If the mildew has been present long enough that the paint beneath it is soft, chalky, or lifting, the coating needs scraping and rebuilding.
Algae and lichen can also appear on exterior paint near the coast, particularly on north walls and areas beneath tree canopy. These organisms hold moisture against the surface and accelerate paint breakdown, so their presence is both a symptom and a cause of ongoing deterioration. Regular fresh-water rinsing of exterior surfaces is one of the simplest things a shoreline homeowner can do to slow biological growth and extend the life of the paint.
Products and primer systems that actually hold up near the water
Choosing exterior paint for a coastal home is not the same as choosing paint for an inland property. The products need to withstand salt, resist UV degradation, flex with moisture cycling, and inhibit biological growth, all at the same time. Standard exterior latex that performs adequately five miles from the water may fail within a few years on a waterfront home.
The good news is that the paint industry has developed products specifically engineered for marine and coastal environments, and they are widely available through major brands. The difference between a paint job that lasts and one that fails early on a shoreline home almost always comes down to whether the products were chosen for the actual conditions the home faces.
Here is what to look for in each layer of the system, and why each choice matters.
100 percent acrylic resin is non-negotiable
The binder in the paint determines its flexibility, adhesion, and resistance to UV and moisture. For coastal applications, 100 percent acrylic formulations are the minimum standard. These paints use pure acrylic resins that maintain flexibility across a wide temperature range and resist the brittleness that causes cracking in standard vinyl-acrylic or styrene-acrylic latex paints.
Premium lines from Benjamin Moore and Sherwin-Williams both offer 100 percent acrylic exterior products that include UV stabilizers, mildewcides, and enhanced adhesion properties. These premium paints cost more per gallon, but on a coastal home, the difference in lifespan makes them dramatically more cost-effective over time.
For homes within a mile of the water, some contractors recommend elastomeric coatings, which are thicker and more flexible than standard acrylic paint. Elastomeric coatings bridge small cracks, resist moisture penetration, and expand and contract more aggressively with temperature changes. They are particularly effective on stucco and masonry, where their ability to span hairline cracks prevents moisture from entering and causing efflorescence or spalling.
The sheen also matters. Satin and semi-gloss finishes shed water more effectively than flat coats and resist dirt and salt pickup better. On a coastal home, a satin exterior finish offers a good balance between durability and appearance, while semi-gloss works well on trim, doors, and other high-contact surfaces.
Primer selection for salt-exposed substrates
Primer on a coastal home is doing more work than primer on an inland property. It needs to block salt-contaminated moisture from reaching the substrate, bond strongly to surfaces that may already have microscopic salt deposits, and create a stable base for the topcoat to adhere to.
For bare wood that has been exposed to salt air, a high-quality alkyd (oil-based) primer penetrates deeply into the wood fibers and creates a strong moisture barrier. Alkyd primers are particularly effective on end grain and cut edges, which are the most vulnerable moisture entry points on wood siding. On previously painted surfaces, a bonding primer formulated for chalky or weathered coatings ensures the new system grips the existing surface rather than sitting on top of a compromised layer.
On masonry and stucco, an alkaline-resistant primer designed for mineral substrates is essential. These primers handle the high pH of fresh masonry and block efflorescence from pushing through the topcoat. Without this specialized primer, paint on coastal masonry will blister and peel within a season as salt and moisture migrate through the substrate.
The primer coat is the most important layer in a coastal paint system. Skipping it or substituting a general-purpose product for a substrate-specific one is the most common shortcut that leads to early failure on shoreline homes.
Mildewcides, UV inhibitors, and other performance additives
Modern premium exterior paints include additives that address specific coastal threats, and these formulations make a measurable difference in how long the coating lasts.
Mildewcides are fungicides blended into the paint that inhibit mold and mildew growth on the dried coating surface. They are standard in most exterior paints but present in higher concentrations in products labeled for humid or coastal environments. On a Norwalk or Stamford shoreline home, a paint with enhanced mildewcide protection will stay cleaner longer and resist the dark staining that plagues coastal exteriors.
UV stabilizers and absorbers in the paint formula act as a sunscreen for the coating, reflecting or absorbing ultraviolet radiation before it reaches the binder and pigment. Products with higher levels of UV protection maintain their color and flexibility longer, especially on south-facing walls.
Some premium coatings also include ceramic microspheres or other reflective additives that reduce heat absorption on dark-colored surfaces. This reduces the thermal cycling stress on the paint film and can extend the repaint interval by a season or two. If you are choosing a darker exterior color for a coastal home, asking your contractor about these advanced formulations is worth the conversation.
Why surface prep matters even more on a shoreline home
Every exterior paint job depends on preparation, but on a coastal home, the prep work carries even more weight. Salt deposits on the existing surface, UV-degraded paint layers, moisture trapped in the substrate, and biological growth all need to be addressed before a single coat of primer goes on. Skipping or shortening this phase is the fastest route to a paint job that fails within a few years.
A professional painting contractor working on a shoreline home should be spending more time on preparation than on application. The painting itself is straightforward. The preparation is where the expertise and the effort that determine longevity live.
Here is what thorough coastal surface preparation includes and why each step is critical.
Salt removal before anything else
The single most important prep step on a coastal home is removing salt from the surface before scraping, sanding, priming, or painting. Painting over a salt-contaminated surface is a guaranteed path to adhesion failure because salt crystals prevent the primer from bonding to the substrate. The paint may look fine for a few weeks, but once humidity and moisture activate the salt beneath the coating, the system separates and peels.
A thorough freshwater wash, either by hand scrubbing or low-pressure power washing, is the first step in any coastal prep sequence. This wash must cover all surfaces that will be painted, including siding, trim, window frames, door frames, and any detail work. The goal is to dissolve and rinse away the salt film that has built up over months or years of exposure.
On surfaces with heavy salt accumulation, a second wash or a cleaning solution specifically designed to neutralize salt deposits may be necessary. Cedar shingles and raw wood are especially prone to deep salt absorption and may need more aggressive cleaning to prepare a bondable surface.
This step adds time and cost to the project, and it is entirely non-negotiable on a shoreline home. Any contractor who proposes skipping or abbreviating the wash on a coastal property does not understand the environment.
Addressing moisture sources and failing caulk
Salt air accelerates the deterioration of caulk, sealant, flashing, and every other component that keeps moisture out of your walls. The same salt that attacks paint also dries out and cracks caulk joints, corrodes metal flashing, and degrades rubber seals around windows and doors. Before repainting, every one of these moisture barriers needs to be inspected and repaired.
Failed caulk around windows and doors is the most common moisture entry point on coastal homes. Salt-laden rain driven by wind penetrates these gaps and wets the wood behind the trim, where it causes rot and paint failure from behind. Resealing all joints with a high-quality, paintable exterior caulk rated for marine environments is an essential step.
Flashing at roof-to-wall intersections, above windows, and around penetrations like light fixtures and vents must also be checked. Corroded or displaced flashing allows water to run behind the siding and into the wall cavity, where it does damage that no amount of exterior paint can prevent. Addressing these moisture sources before painting ensures the new coating has a dry, stable substrate to bond to.
Scraping, sanding, and priming to coastal standards
Once the surface is clean and dry and all moisture entry points have been sealed, the standard exterior prep sequence applies, with a few coastal-specific adjustments.
- Scrape all peeling, flaking, blistering, or poorly adhered paint back to a firm edge where the remaining coating is solidly bonded to the substrate
- Sand scraped areas to feather transitions between bare substrate and intact paint, creating a smooth profile
- Repair or replace any wood that shows signs of rot, softness, or salt-related fiber damage
- Fill cracks and gaps with marine-grade or exterior-rated filler that can handle moisture and temperature cycling
- Prime all bare wood, repairs, and exposed substrate with the appropriate coastal primer for the material
On a coastal home, the sanding step often reveals more damage than expected because salt and moisture have weakened adhesion in areas that looked intact on the surface. A thorough contractor will test adhesion in multiple spots around the house, not just the obviously damaged areas, to identify hidden failure zones before they cause problems under the new coating.
The priming step is where coastal work diverges most from inland projects. Every exposed substrate surface must receive a full coat of appropriate primer, and on the most exposed elevations, two coats of primer may be warranted. The primer is the moisture barrier and the adhesion layer, and on a coastal home, it is working harder than anywhere else.
A maintenance schedule that extends your paint job
Even the best paint system on a Fairfield County shoreline home needs ongoing care to reach its full lifespan. The salt, UV, and humidity environment does not stop working on the coating after the painters leave, and a simple maintenance routine can add years to the repaint interval.
The maintenance is not complicated or expensive. Most of it involves periodic inspection and cleaning that a homeowner can do themselves or schedule with a service provider. The goal is to remove salt buildup before it damages the coating, catch moisture problems before they spread, and address small issues before they become large ones.
Treating this as a seasonal habit rather than an annual project makes it easy to stay ahead of the damage. Here is a practical schedule.
Seasonal rinse-downs and annual inspections
The single most effective maintenance step for a shoreline home is rinsing the exterior with clean fresh water on a regular basis. A garden hose or low-pressure washer aimed at all painted surfaces once a quarter dissolves and removes salt deposits before they have time to degrade the coating. Focus especially on the water-facing elevations, trim, and any areas where salt visibly accumulates.
In late spring, after winter has passed, do a more thorough walk-around inspection of the entire exterior.
- Check for chalking by running a hand across the siding in several locations
- Look for peeling, blistering, or cracking, especially around windows, doors, and trim joints
- Inspect caulk lines for cracking, separation, or gaps
- Note any areas where mildew, algae, or dark staining has appeared
- Check metal components like gutters, flashing, and fasteners for rust or corrosion
Document what you find and share it with your painting contractor. Homeowners in Stratford and other shoreline communities benefit from scheduling a brief spring check-in with their painter to identify whether a targeted repair now will prevent a larger project later. Many issues caught in year two or three of a paint job can be fixed with spot treatment and touchup rather than a full repaint.
Touch-up and spot repair before problems spread
Small areas of damage, a section of peeling trim, a blister on one clapboard, a crack in a caulk joint, are best addressed immediately rather than left for the next full repaint. On a coastal home, every break in the paint film is an entry point for salt and moisture that will steadily enlarge the damage if left open.
A touch-up on a coastal home follows the same sequence as the full prep, just on a smaller scale. Clean the area with fresh water to remove salt. Scrape and sand the damaged spot back to sound paint. Prime any bare substrate. Apply two coats of matching topcoat. The repair takes an hour and prevents a problem that might cost thousands to fix if it reaches the underlying wood.
Keep a small supply of your home’s exterior paint and primer on hand for these spot repairs. Your painting contractor should be able to provide the exact product and color formula used on the last job. Having it available means you can address damage as soon as you spot it rather than waiting weeks to order materials and schedule a crew.
When it is time for a full repaint
On a well-maintained shoreline home with proper products and preparation, a full exterior repaint is typically needed every five to seven years. Homes closer to the water or with heavy exposure in towns like Milford and Fairfield may be on the shorter end, while homes with some shelter or lower salt load may push toward the longer end.
The right time to schedule a repaint is when inspection reveals widespread chalking, multiple areas of peeling or adhesion loss, or coating thickness that has eroded to the point where the primer or previous layers are showing through. Waiting past this point allows moisture to penetrate the substrate and creates a larger, more expensive project.
Planning ahead is valuable. If your last paint job was four or five years ago and the most exposed walls are starting to show wear, booking a spring consultation with your contractor gives you time to schedule the work during the ideal painting window. Late May through September offers the warm, dry conditions that exterior paint needs to cure fully and build maximum adhesion before winter.
Conclusion
Living near the Connecticut shoreline is one of the best things about Fairfield County, and keeping your home protected in that environment is a solvable problem. The salt, UV, and humidity challenges are real, but the right paint products, thorough preparation, and a simple maintenance routine can keep your exterior looking sharp and performing well for years between repaints.
The key is working with a team that understands what coastal conditions demand and builds the paint system accordingly, from salt removal and substrate repair through primer selection and topcoat application. A shoreline home deserves more than a standard paint job, and the investment in getting it right pays for itself in fewer repaints, less substrate damage, and lasting protection.
If your shoreline home is due for attention or you want to find out how your exterior is holding up, Greenhaus Painting can help. Request your free estimate and get a plan built for the conditions your home actually faces.