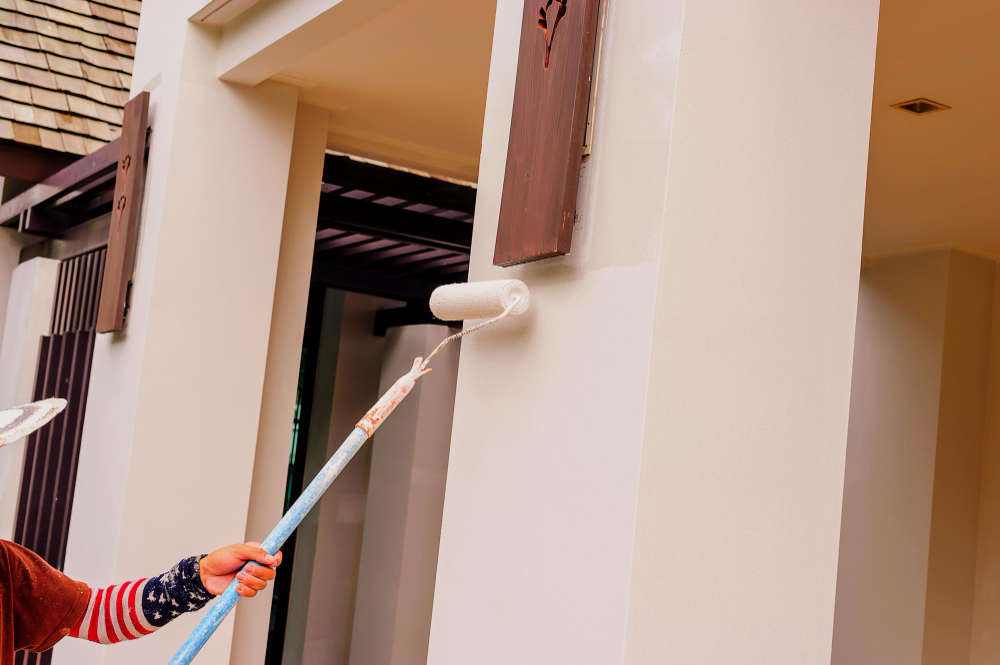
If you are planning on painting an older Connecticut home, the project probably involves more than picking a color and scheduling a crew. Homes built before 1978 in this state carry a real chance of having lead-based paint somewhere on their surfaces, and that changes everything about how the prep work needs to happen. Fairfield County is full of colonials, Victorians, and mid-century capes that have been painted and repainted for decades, and many of those layers still hold lead.
This is not a niche issue for a handful of houses. Connecticut has one of the oldest housing stocks in the country, and according to the Connecticut Department of Public Health, roughly 73 percent of the state’s homes were built before 1980. That means the majority of properties across towns like Greenwich, Ridgefield, Norwalk, and Stamford fall into the window where lead paint was standard. Scraping, sanding, or power washing those surfaces without the right approach can turn a routine repaint into a health hazard.
The good news is that a paint job on an older home is absolutely doable when the prep is handled correctly and the right people are doing the work. Federal EPA rules spell out exactly what contractors are required to do, and a professional painting team that follows those standards can refresh your home safely and thoroughly.
In this article, you will learn about:
- Why Connecticut homes are especially likely to have lead paint
- How lead paint puts your family and property at risk during renovations
- What the EPA’s RRP rule requires before work begins
- The prep steps that separate a safe paint job from a dangerous one
- Your options for managing lead paint on interior and exterior surfaces
- How to choose a painting contractor who handles older homes correctly
Keep reading to understand exactly what is involved so you can make confident, informed decisions before any paintbrush touches your walls or siding.
Why so many Connecticut homes still have lead paint
Connecticut is one of the most historically rich states in the Northeast, and that history shows up in its housing. From pre-Revolutionary colonials in Fairfield and Ridgefield to postwar capes in Stamford and Norwalk, the homes here span centuries of construction. That long building timeline also means a long timeline of lead-based paint use, which was not banned for residential purposes until 1978.
The scale of the issue is hard to overstate. A 2022 EPA enforcement letter addressed to Connecticut contractors noted that nearly three out of every four homes in the state were built before 1980, making lead-based paint a widespread concern for workers and families alike. That ratio is well above the national average, and it means that a homeowner in Fairfield County is more likely than not to be living in a home that contains some amount of lead paint.
Understanding why lead was so common, where it tends to show up, and how a home’s age changes the risk level makes a real difference in planning any painting or renovation project.
The age of your home changes the odds dramatically
Not all pre-1978 homes carry the same level of risk. The U.S. Environmental Protection Agency breaks the likelihood down by construction era, and the numbers are significant. Homes built before 1940 have roughly an 87 percent chance of containing lead-based paint. For homes built between 1940 and 1959, that drops to about 69 percent. And for homes from 1960 through 1977, the figure is around 24 percent.
Those percentages matter because Fairfield County has homes spanning all three eras. A colonial in Greenwich built in the early 1900s sits in the highest risk category, while a mid-century ranch in Trumbull might fall in the middle range. Even a home from the late 1960s or early 1970s could still carry lead paint on trim, windowsills, or doors.
The takeaway is straightforward. If your home was built before 1978, the safest assumption is that lead paint is present somewhere. The EPA itself recommends either testing or simply treating the home as if it contains lead and taking the appropriate precautions from the start.
Where lead paint hides in older homes
Lead paint does not always announce itself. In many Connecticut homes, it is buried under multiple layers of newer paint, sitting quietly on surfaces that have been repainted several times over the decades. It becomes a problem only when those layers are disturbed through scraping, sanding, cutting, or friction from everyday use.
The surfaces most likely to hold lead paint are the ones that were originally finished with glossy or semi-gloss coatings. That includes window frames and sashes, door frames, baseboards, stair railings, exterior siding and trim, and porch railings. These are also the surfaces that take the most wear, meaning they are more likely to have chipping, peeling, or flaking paint that can release lead dust into the air and soil. Homes that have experienced water damage are particularly vulnerable because moisture accelerates the breakdown of paint layers.
Exterior paint deserves special attention. Lead concentrations tend to be higher in older exterior paints, particularly white and light-colored formulas manufactured before 1955. Those paints frequently used a lead and linseed oil mixture that produced extremely high lead content. If your older Connecticut home has original white exterior paint under newer coats, extra caution during prep work is critical.
Connecticut’s housing stock compared to the rest of the country
Connecticut ranks among the top five states nationally for the percentage of homes built before 1960. According to American Community Survey data, roughly 43 percent of the state’s housing was constructed before 1960, and the median year a Connecticut home was built is 1966. In Fairfield County specifically, the Bridgeport-Stamford-Norwalk metro area ranks among the top midsize metros in the nation for median housing age.
That context matters because it means the lead paint issue is not an edge case here. It is the default condition for a large share of properties. Towns like Darien are full of homes that predate the ban, and the same is true in Ridgefield and across Fairfield. Even suburban developments from the 1950s and 1960s frequently used lead-based primers and finish coats.
When you combine an older housing stock with Connecticut’s seasonal climate, which cycles through freeze-thaw, humidity, and coastal salt exposure, you get painted surfaces that deteriorate faster than in milder regions. Timing your project around the seasons matters even more when lead-safe containment is part of the plan.
How lead paint becomes dangerous during a painting project
Lead-based paint that is intact, well-adhered, and buried under fresh coats is generally not an immediate threat. The danger comes when that paint is disturbed, and a painting project is one of the most common ways that happens. Scraping, sanding, stripping, and even power washing can break lead paint into dust and chips that are harmful to inhale or ingest.
The EPA’s fact sheet on lead-based paint dust notes that a 2021 analysis estimated roughly 31 million pre-1978 homes in the United States still contain lead-based paint. Disturbing that paint without proper containment and cleanup sends microscopic lead particles into the air, onto the ground, and into living spaces where they can affect anyone in the home.
This section covers who is most at risk, what the specific health concerns look like, and why even outdoor work can create problems inside your house.
Children and families face the highest exposure risk
The EPA identifies children under six years old as the most vulnerable population. Their developing brains and nervous systems are more sensitive to lead, and they are more likely to come into contact with contaminated dust through normal behavior, putting hands, toys, and objects into their mouths throughout the day. Even small amounts of lead exposure can lead to developmental delays, learning difficulties, and behavioral changes.
Adults are not immune, either. Lead exposure in adults has been linked to increased risk of cardiovascular problems, kidney damage, and reproductive issues. Pregnant women face additional risks because lead stored in bones can be released during pregnancy and reach the developing baby.
The practical concern for homeowners is that a painting project, especially exterior prep work, generates exactly the kind of dust that creates these exposures. Lead dust is fine enough to drift through open windows, settle on play areas, and contaminate soil near the foundation where children and pets spend time. Choosing a crew that uses low-VOC products in addition to lead-safe practices adds another layer of protection for indoor air quality.
Lead dust does not stay where you make it
One of the most common misconceptions about lead paint is that exterior work stays outside. In reality, lead dust generated on the exterior of a home can enter through open windows, screen doors, and HVAC intakes. It can be tracked inside on shoes and clothing. And once it is in the soil around your home’s foundation, it stays there.
Lead does not biodegrade or break down over time. It remains in soil for thousands of years. Children playing in the yard, gardening near the house, or simply walking through contaminated areas can pick up lead particles and bring them indoors. This is why containment during exterior painting is not optional. It is the only way to prevent long-term contamination of the soil and surrounding surfaces. Homeowners planning a wall repainting project in Norwalk or any other Fairfield County town need to account for this reality from the start.
Interior projects carry their own risks. Sanding trim and molding in an older home generates fine dust that circulates through the room and settles on everything. The same applies to scraping window frames or prepping walls before a fresh coat. Without proper plastic sheeting, HEPA filtration, and wet cleaning methods, that dust spreads quickly through the rest of the house.
Why ordinary cleanup is not enough
Standard vacuuming and sweeping are ineffective against lead dust. A regular household vacuum exhausts fine particles back into the air, making the contamination worse. Sweeping stirs dust into suspension where it can be inhaled. The only effective cleanup methods involve HEPA-filtered vacuuming followed by wet wiping with disposable cloths.
The EPA updated its dust-lead action levels in January 2026, lowering the thresholds for what constitutes a hazard. The new standard for floors is 5 micrograms of lead per square foot, down from 10, and the standard for windowsills dropped to 40 micrograms per square foot. These tighter limits reflect the scientific consensus that there is no safe level of lead exposure, and they raise the bar for what constitutes acceptable post-work cleanup.
For homeowners, this means that a painting crew working on a pre-1978 home must follow specific cleaning protocols after the work is done. Casual cleanup and a quick wipe-down are not sufficient to meet the current standards, and they are not sufficient to protect your family.
What the EPA’s RRP rule actually requires
The federal Renovation, Repair, and Painting rule, commonly called the RRP rule, is the regulatory framework that governs how contractors must handle work on pre-1978 homes. It is not a suggestion or a best practice. It is a legal requirement, and the EPA actively enforces it against painting contractors, remodelers, and other firms that fail to comply.
As of January 2026, enforcement has tightened further. The EPA lowered its dust-lead hazard thresholds, and penalties for violations now run up to tens of thousands of dollars per incident per day. Connecticut is a state where the EPA has specifically focused compliance inspections on painting and renovation contractors, making this a real and present enforcement concern in Fairfield County.
If you are hiring a painter for any project that disturbs painted surfaces in a pre-1978 home, this rule applies. Here is what it covers and what it means for your project.
Who must be certified and what that means
The EPA’s RRP program page states clearly that any firm paid to perform work that disturbs painted surfaces in pre-1978 homes or child-occupied facilities must be certified and must have trained employees using lead-safe work practices. This applies to all firms, including sole proprietors. Painters, carpenters, window installers, plumbers, and electricians are all covered if their work disturbs paint.
Certification has two parts. The firm itself must be an EPA-certified renovation firm, and at least one person on each job must be a certified renovator who has completed EPA-accredited training. That certified renovator is responsible for overseeing lead-safe work practices, testing painted surfaces for lead, and documenting compliance throughout the project.
Homeowners doing their own work in their own homes are generally exempt from the certification requirement. But if you hire anyone to do the work for you, whether for a full-service interior repaint or a single room, they must be certified. There is no exception for small jobs, handymen, or unlicensed painters.
Lead testing before work begins
Before a certified renovator starts work on a painted surface, they must determine whether lead-based paint is present. This is typically done using an EPA-recognized test kit or by sending paint chip samples to a qualified laboratory. Each painted component that will be disturbed, such as a window frame, a section of trim, or an area of siding, must be tested individually.
If lead is found, or if the renovator chooses to presume lead is present and skip testing, then the full set of lead-safe work practices must be followed throughout the project. Understanding how primers work in this context matters, because the right primer is essential for sealing and covering lead-painted surfaces safely. If testing confirms that a specific surface does not contain lead, that surface can be treated normally while the rest of the home still receives lead-safe handling.
Testing adds a step to the project timeline, but it is a critical one. It determines the scope of containment, the prep methods used, the cleaning protocols required, and the documentation that must be kept on file. Skipping it is a regulatory violation.
What happens if a contractor ignores the rule
The consequences for RRP violations are not abstract. The EPA’s 2026 enforcement alert highlights real cases where painting contractors and franchises faced penalties for failure to comply. Fines can reach tens of thousands of dollars per violation per day, and the EPA has pursued both civil and criminal enforcement actions.
In Connecticut specifically, the EPA documented enforcement actions against firms that were not properly certified, did not use certified renovators, failed to distribute the required “Renovate Right” pamphlet, and did not maintain proper records. These are not hypothetical scenarios. They are things that have happened to real contractors working on Connecticut homes.
For homeowners, this is a screening tool. Any painter you hire for a pre-1978 home should be able to show their EPA firm certification on request and explain their lead-safe practices clearly and specifically. A contractor who is vague about the RRP rule, or who says it does not apply to your job, is waving a red flag.
The prep work that keeps your home and family safe
Surface preparation on an older home is already the most labor-intensive part of any paint job. When lead is in the picture, prep gets even more involved because every step that disturbs paint needs containment, dust control, and proper disposal. Cutting corners on prep is what creates the health hazards, so understanding what proper lead-safe prep looks like helps you evaluate the crew working on your home.
The standard approach combines containment to catch debris, wet methods to minimize airborne dust, careful manual work instead of aggressive power tools, and thorough cleanup afterward. Every step is designed to keep lead particles out of the air, the soil, and your living spaces.
This is where the quality of your painting contractor shows. The difference between a crew that follows proper lead-safe protocols and one that treats your 1930s colonial like a ten-year-old tract home is the difference between a project that protects your property and one that contaminates it.
Containment and workspace setup
Before any scraping or sanding begins, the work area must be sealed off. For exterior work, the EPA requires plastic sheeting extending at least 10 feet out from the base of the wall being worked on. All windows and doors within 20 feet of the work area must be closed and sealed. The sheeting must be weighted or taped to prevent it from shifting, and it must be arranged so that all paint chips, dust, and debris land on it rather than on the ground. This is part of the broader preparation process that determines how the project turns out.
Interior containment follows similar principles. Plastic sheeting covers the floor and any furnishings in the work area. Doorways leading to other rooms are sealed with plastic and tape. If the project involves sanding or scraping, HEPA-filtered air scrubbers may be used to capture fine dust before it spreads through the house.
The goal is to create a contained workspace where all lead-contaminated material stays in one controlled zone until it can be collected, bagged, and disposed of properly. When done well, this containment is the single most important step in preventing lead exposure during a painting project.
Wet scraping, wet sanding, and what to avoid
Lead-safe prep work depends on keeping dust levels low, and the primary tool for that is water. Wet scraping means misting the surface with a spray bottle before and during scraping to keep paint particles from becoming airborne. Wet sanding follows the same principle, using moisture to turn dust into a controllable sludge rather than fine airborne particles.
Several common prep methods are explicitly discouraged or prohibited when lead paint is present. These include the following, and any contractor who uses them on a pre-1978 home is not following proper lead-safe practices.
- Dry scraping without containment, which sends paint chips and dust across the work area
- Dry sanding or power sanding without a HEPA-filtered shroud, one of the worst dust generators
- Power washing painted surfaces, which blasts lead chips into the soil and can force contaminated water into the ground
- Open-flame torching or high-temperature heat guns above 1,100 degrees Fahrenheit, which vaporize lead and create toxic fumes
- Uncontained abrasive blasting, which disperses lead particles over a wide area
The safe alternatives are manual and slower, but they are effective. Hand scraping with wet misting, chemical paint strippers, low-temperature infrared paint removers, and HEPA-vacuum-assisted sanding are all accepted methods that keep lead exposure under control.
A contractor who pushes back on these methods or suggests that outdoor work does not need containment is not someone who should be working on your home.
Cleanup and waste disposal after prep
Cleanup on a lead-safe project is a defined process, not a quick sweep. After all scraping, sanding, and priming are complete, the work area must be cleaned using a specific sequence. HEPA-filtered vacuuming comes first to collect fine dust from all surfaces, including walls, window sills, floors, and any horizontal surfaces where dust settles. Wet wiping with disposable cloths follows to capture anything the vacuum missed.
All waste from the project, including paint chips, used sandpaper, disposable suits, plastic sheeting, cleaning cloths, and HEPA vacuum filters, must be collected in heavy-duty plastic bags labeled as lead waste. According to EPA guidelines, these materials must be taken to a certified construction and demolition waste facility or municipal landfill for proper disposal. They cannot be burned, buried, or thrown in standard household trash.
If any soil near the work area shows visible paint chips or dust accumulation, that soil may also need to be removed and replaced. This is one more reason why proper containment at the outset is so important. Preventing soil contamination is far easier and cheaper than remediating it after the fact.
Your options for dealing with lead paint, surface by surface
Not every surface with lead paint requires the same treatment. The condition of the paint, the location of the surface, how much friction or wear it receives, and whether children use the space all factor into the right approach. A reputable contractor will walk the home, assess each area individually, and recommend the least disruptive method that actually resolves the hazard.
Broadly, there are three categories of response. Encapsulation seals lead paint in place under a durable barrier. Enclosure covers it with a new rigid surface. Removal strips it entirely. Most older homes end up with a combination of methods tailored to each surface, and that is usually the most practical and cost-effective route.
Understanding the trade-offs helps you have a more productive conversation with your painting contractor and avoid paying for more aggressive treatment than the situation actually calls for.
When encapsulation makes sense and when it does not
Encapsulation involves applying a specialized coating over intact lead paint that forms a durable, sealed barrier. It is faster and less expensive than full removal, it generates little to no dust, and it is recognized by the EPA as a legitimate lead-safe method for managing painted surfaces. The type of finish applied over the encapsulant also plays a role in long-term durability.
It works well on flat, stable surfaces that do not receive heavy friction or impact. A wall or ceiling where the existing paint is firmly adhered and in good condition is a strong candidate for encapsulation. This is often the case with bedroom walls and other low-traffic areas where the paint has not been physically disturbed. Exterior siding that is sound and has not started to peel is another common application.
Encapsulation is not the right choice for every surface, though. It requires ongoing maintenance and monitoring. If the encapsulant coating chips or degrades, the underlying lead paint is exposed again. For that reason, it is generally not recommended for the following situations.
- High-friction surfaces like window sashes, doors, and stair treads where regular contact wears through coatings
- Surfaces with peeling, cracking, or flaking paint that need to be stabilized before any coating can adhere
- Areas accessible to young children who might chew or scratch at the surface
- Surfaces that will undergo future renovation work that would disturb the encapsulant layer
When encapsulation is appropriate, it is an efficient and safe solution. The surface can then be finished with standard paint or even a decorative technique once the encapsulant has cured. When it is not appropriate, removal or replacement of the component is a better investment.
Removal and replacement for high-risk surfaces
Full removal of lead paint means stripping the surface down to bare substrate and disposing of all lead-contaminated material. It is the most thorough option and the only one that permanently eliminates the hazard from the home. It is also the most disruptive, most expensive, and most heavily regulated approach.
Any removal project that disturbs more than six square feet of interior surface in a single room requires an EPA-certified lead abatement team, not just a certified renovator under the RRP rule. Abatement is a separate and higher level of certification with stricter containment, testing, and clearance requirements.
For many older Connecticut homes, the most practical version of removal is component replacement rather than paint stripping. Replacing a lead-painted window frame with a new one, swapping old baseboards for new trim, or installing new siding over the old are all ways to remove the lead source without the dust and disruption of chemical or mechanical stripping. This approach is common in Fairfield County renovations where homeowners are updating older homes and can combine lead management with broader improvements. It is a fundamentally different process from painting a new construction home where lead is never a factor.
The decision between encapsulation and removal often comes down to the surface in question, its condition, and whether children are in the home. A good contractor will explain the reasoning for each recommendation rather than defaulting to the most expensive option across the board. Whether you are refreshing a living room in Greenwich or repainting exterior siding on a colonial in Westport, the approach should be tailored to each surface.
How exterior and interior projects differ in lead-safe approach
Exterior and interior painting projects on an older home involve the same principles but different execution. Exterior work typically involves more surface area, more aggressive prep due to weather damage, and greater concern about soil contamination. Interior painting focuses more on dust containment within living spaces and protecting occupants during the work.
On the exterior, trim and siding joints are the primary areas where lead paint peels and chips. Connecticut’s seasonal cycles of freeze-thaw, summer humidity, and salt air exposure in coastal towns accelerate the breakdown of paint layers, including lead-based ones. Homeowners in Greenwich and other shoreline communities see this deterioration happen faster than those further inland. Containment on the exterior must account for wind, which can carry dust well beyond the 10-foot sheeting perimeter, and rain, which can wash contaminated debris off sheeting and into the yard.
Interior projects require different logistics. Furniture and flooring must be protected, ventilation must be carefully managed to avoid spreading dust through the HVAC system, and occupants, especially young children and pregnant women, should plan to be out of the home during active prep work. Even a focused project like an accent wall in a pre-1978 home may require lead testing if the original paint will be disturbed. The cleanup standards are also tighter indoors because the exposure pathways are more direct.
Neither type of project is inherently harder or easier. They just require different containment strategies, and a contractor experienced with older homes in the region will plan accordingly for each one.
Choosing a contractor who actually gets this right
Hiring a painter for an older Connecticut home is different from hiring one for a newer property. The lead-safe requirements add a layer of technical knowledge, regulatory compliance, and attention to detail that not every painting company has. And because the stakes involve your family’s health and potential federal penalties, vetting your contractor carefully is worth the effort.
The good news is that the certification and documentation requirements make it relatively easy to verify whether a contractor is qualified. You do not need to take their word for it. There are concrete questions you can ask, documents you can request, and red flags that are easy to spot if you know what to look for.
This section covers what to verify, what to ask, and what separates a contractor who handles older homes properly from one who treats every job the same regardless of the home’s age or history.
What to verify before signing a contract
Before any work begins, a painting contractor should be able to provide documentation of their EPA firm certification. This is a searchable record. You can verify a firm’s certification status through the EPA’s online database or by requesting their certification number directly. If a firm cannot produce this documentation, they are not legally permitted to work on your pre-1978 home.
Beyond firm certification, ask about individual training. The certified renovator assigned to your project should have completed an EPA-accredited training course and hold current credentials. These certifications require renewal, so ask when the training was last completed.
You should also expect the contractor to provide you with the EPA’s “Renovate Right” pamphlet before the project begins. This is a legal requirement under both the RRP rule and federal real estate disclosure law. A contractor who skips this step is already in violation of the regulation.
- Verify the firm’s EPA certification number through the EPA’s searchable database
- Ask for the name and certification credentials of the lead renovator assigned to your project
- Confirm that you will receive the “Renovate Right” pamphlet before any work starts
- Request a written scope of work that addresses lead testing, containment, and cleanup
These are not unusual or burdensome requests. Any contractor who has done this work correctly before will be ready to provide everything on this list without hesitation.
Questions that reveal how a contractor approaches older homes
The certification documents tell you whether a contractor meets the legal minimum. The conversation tells you whether they actually understand the work. A few pointed questions can reveal how much real experience a contractor has with lead-safe projects on older homes.
Ask how they test for lead and what happens if they find it. A knowledgeable contractor will describe the testing process, explain that each component must be tested individually, and outline how positive results change the prep plan. If the answer is vague or dismissive, that is a concern.
Ask about their containment setup for exterior work. A strong answer includes specifics about sheeting dimensions, how they handle windy days, whether they close windows and doors near the work area, and how they prevent debris from reaching the soil. A weak answer skips those details.
Ask what cleaning protocols they follow after the prep work is done. The right answer involves HEPA vacuuming, wet wiping, and bagged disposal of all contaminated materials. The wrong answer is “we clean up like any other job.”
The point of these questions is not to quiz the contractor. It is to confirm that they have done this before, that they understand the risks, and that they have a detailed plan for your specific project. A contractor who has worked extensively on older Fairfield County homes will answer these questions easily and confidently.
Red flags that should make you walk away
Some warning signs are obvious enough that they should end the conversation. If a painting contractor tells you the RRP rule does not apply to exterior work, that is wrong. If they say lead paint is only a concern for homes built before 1950, that is wrong. If they suggest power washing exterior paint on a pre-1978 home without testing for lead first, that is both wrong and potentially dangerous. Homeowners in Danbury and across every town in the county deserve a contractor who knows the difference. The same standard applies whether your project is in Shelton, Milford, or anywhere else in the region.
Other red flags are more subtle. A contractor who gives a price without ever asking when your home was built is not thinking about lead. A crew that shows up without plastic sheeting, HEPA vacuums, or any containment materials is not prepared for lead-safe work. A contractor who resists putting their lead-safe plan in writing may not have one.
Price can also be a signal. Lead-safe work costs more than standard painting because it requires more time, more materials, and more careful execution. A bid that comes in dramatically lower than competitors for the same scope on a pre-1978 home may be cutting exactly the corners that matter most. The cheapest option on a lead paint project can end up being the most expensive one when health consequences and remediation costs are factored in.
Conclusion
Painting an older Connecticut home takes more planning and care than painting a newer one, but it is not a reason to avoid the project. The homes across Fairfield County are worth maintaining, and a fresh coat of paint is one of the most effective ways to protect the structure, refresh the look, and add lasting value. When lead paint is part of the picture, the key is working with a team that knows the regulations, follows lead-safe practices, and treats the prep work as seriously as the finish.
The EPA rules exist to protect your family, your neighbors, and the people doing the work. A qualified contractor will meet those requirements as a matter of course, not as an afterthought. The questions in this article give you a clear way to evaluate any painter you are considering and ensure the project is handled safely from start to finish.
If you are ready to repaint your older Connecticut home and want a team that does the job with premium prep, careful execution, and full attention to safety, Greenhaus Painting is here to help. Request your free estimate to get the conversation started.