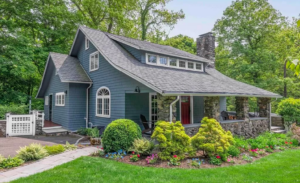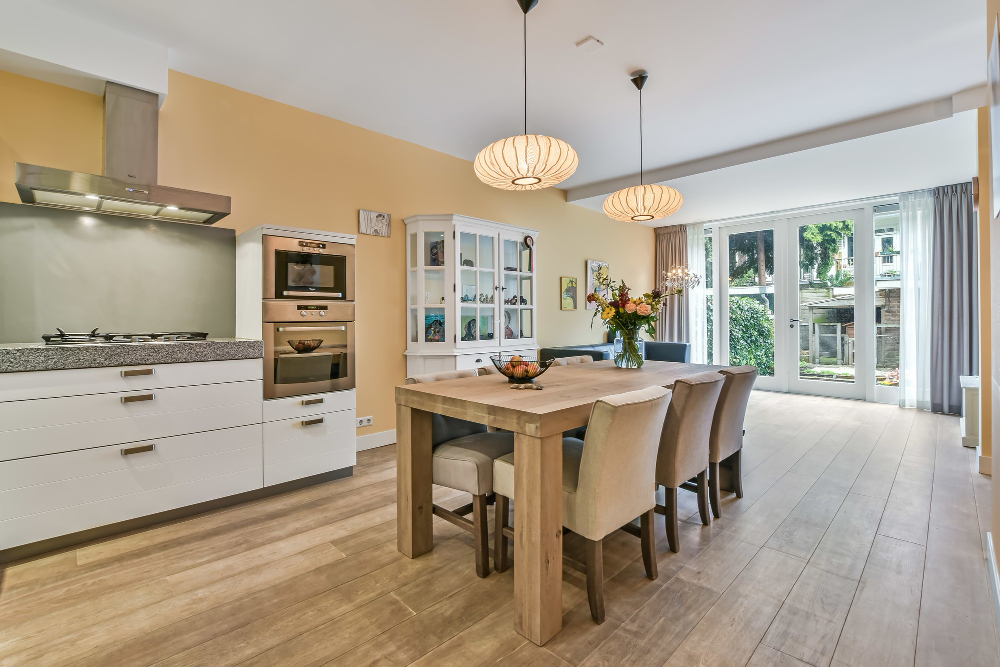
If you are thinking about ways to refresh your home with interior painting in Easton, CT, you are not alone. Easton homeowners live with some of the most distinctive residential architecture in Fairfield County, from Colonials dating back to the 1700s to contemporary builds on multi-acre lots. That variety means every painting project carries its own set of surface conditions, prep requirements, and finish expectations.
A good interior repaint does more than change a color. It restores the feeling of a space, addresses wear you have been living with for years, and protects surfaces that take daily punishment from foot traffic, furniture, and sunlight.
The timing question is worth considering, too. Connecticut’s seasonal swings are hard on homes inside and out. Humid summers can leave walls feeling sticky and stale, and long heating seasons dry out interior air enough to crack caulk lines and pull paint away from trim edges.
Knowing the best time to paint in Connecticut helps you plan around the weather rather than reacting to damage. Many homeowners across Fairfield County treat an interior repaint as scheduled maintenance rather than a reactive fix, and that approach pays off.
Easton sits in a quieter pocket of the county, but the homes here are far from simple. Large footprints, high ceilings, detailed trim, and rooms flooded with natural light all raise the bar for what a professional paint job needs to deliver. Whether you are updating a single room or repainting the entire first floor, understanding what goes into the process helps you get better results and avoid the kind of shortcuts that show up six months later.
In this article, you will learn about:
- Why Easton homes benefit from a professional interior repaint
- Choosing colors and finishes that work in Connecticut’s natural light
- Surface prep that separates a lasting finish from a quick cover-up
- What to expect from a professional interior painting project
- Protecting your investment after the paint dries
Keep reading to learn how the right approach to interior painting can transform the way your Easton home looks and feels for years to come.
Why Easton homes benefit from a professional interior repaint
Easton is one of those Fairfield County towns where the homes have real character. The Town of Easton’s Historic Resources Inventory records over 150 historic homes, many dating to the 1700s, and the residential landscape today blends those original Colonials with Cape Cods, farmhouses, and newer contemporary builds on generous lots. That architectural range is part of what makes the town special, but it also means that interior painting here is rarely a straightforward job.
Older homes in Easton often have plaster walls, layered trim profiles, and original woodwork that require careful preparation before any paint goes on. Newer builds tend to have large open rooms with long, uninterrupted wall runs where every imperfection in the finish shows. Both demand a level of attention that separates professional results from a weekend project that starts peeling within a year. The homes along Sport Hill Road and the properties tucked into wooded lots near the Aspetuck River each present different challenges, but the common thread is that Easton homeowners expect quality.
Wear patterns Connecticut homeowners actually notice
The signs that your interior paint is due for a refresh are not always dramatic. Most homeowners do not wake up one morning to peeling walls. Instead, the decline is gradual, and it happens in specific places that take the most abuse.
High-traffic hallways and stairwells are usually the first areas to show scuffing and dullness. Entryways that see boots, bags, and keys dragged across the wall surface lose their sheen faster than a bedroom that barely gets touched. Kitchens and bathrooms deal with moisture and temperature swings that cause paint to lose adhesion over time, especially around window frames and along ceiling lines.
Sunlight plays a major role in Easton homes, where large windows and open floor plans are common. UV exposure fades paint unevenly, so the wall behind a sofa might hold its color while the opposite wall looks washed out. That uneven fading is one of the most common reasons homeowners decide it is time to repaint. If you are noticing any of these signs, a professional assessment of your interior painting needs can tell you whether the issue is cosmetic or structural.
The changes happen slowly enough that you stop seeing them. Then a piece of furniture moves and the contrast between the protected wall and the exposed wall tells the whole story.
When repainting is maintenance, not just aesthetics
Plenty of homeowners think of interior painting as a cosmetic upgrade, something you do when you are tired of a color. But in Connecticut’s climate, it functions more like preventive maintenance.
Interior humidity fluctuates significantly between summer and winter. During the heating season, indoor relative humidity can drop low enough to cause paint to dry out, shrink, and crack at seams and joints. In summer, the opposite problem surfaces. Moisture buildup in bathrooms, kitchens, and laundry rooms can compromise adhesion if the existing paint film is already thin or failing. Repainting on a reasonable cycle, typically every five to eight years for high-use areas, keeps that protective layer intact.
Beyond moisture, there is the question of what is underneath the paint. Many Easton homes built before 1978 may contain layers of lead-based paint beneath newer coats. According to the U.S. EPA, HUD’s American Healthy Homes Survey II estimated that roughly 29 percent of all housing units in the United States contain lead-based paint applied before the 1978 ban. For homes in towns like Easton, where the housing stock skews older, the percentage is likely higher. Professional painters working in pre-1978 homes follow EPA Renovation, Repair and Painting (RRP) rule requirements to manage lead-safe work practices, which is not something a DIY project typically accounts for.
Treating repainting as part of your home’s maintenance schedule, the same way you would schedule roof inspections or gutter cleanings, protects both the surfaces and the people living in the home.
That nagging feeling your rooms look “off” is probably real
Sometimes the motivation for repainting is not damage or wear. It is a feeling. The living room just looks flat. The dining room feels smaller than it should. The hallway connecting the kitchen to the family room has a color that made sense ten years ago but now clashes with everything around it.
That instinct is usually accurate. Colors interact with light, furniture, flooring, and adjacent rooms in ways that shift over time, especially after renovations or furniture changes. A room that was painted to complement oak floors may not work as well after those floors were refinished in a darker stain. A kitchen wall that matched older countertops can suddenly feel dated after a cabinet refresh. If you are also thinking about resale, the paint colors that increase home value in Fairfield County lean toward the same neutral palette that makes everyday living more comfortable.
The fix does not always require a dramatic change. Sometimes a half-shade adjustment or a sheen change, going from flat to eggshell on a living room wall, for example, corrects the issue without making the room feel unfamiliar. Professional color consultation helps homeowners pinpoint what is actually bothering them and find a solution that fits the space.
Choosing colors and finishes that work in Connecticut’s natural light
Color selection is where most homeowners either love the final result or immediately regret it. The challenge in Easton, and across Fairfield County, is that Connecticut’s natural light changes dramatically between seasons, time of day, and even room orientation. A color that looks warm and inviting at the paint store can read completely different on your north-facing dining room wall at 4 p.m. in January.
Understanding how light behaves in your specific rooms before committing to a color is not overthinking it. It is the difference between a room that feels right and one that nags at you every time you walk through it. Easton homes often have the advantage of generous windows and high ceilings, but that also means more natural light to interact with the paint, which amplifies both good and bad color choices.
North-facing rooms versus south-facing rooms
The direction a room faces determines the quality and warmth of the natural light it receives throughout the day. In a town like Easton, where many homes are set among trees and on rolling terrain, the surrounding landscape also affects how much light makes it through the windows.
North-facing rooms get consistent, cool light all day. That light tends to pull warmth out of colors, making warm tones look flatter and cool tones look colder than expected. If you are painting a north-facing room, lean toward colors with warm undertones, even if the overall shade is neutral. A greige with a hint of taupe, for instance, will feel balanced in cool light rather than sterile.
South-facing rooms are the opposite. They get strong, warm light for most of the day, which intensifies warm tones and can make a soft yellow feel almost aggressive by mid-afternoon. In these rooms, slightly cooler neutrals and softer whites hold up better across the full day. A pure white that looks crisp in a north-facing room can feel blinding in a south-facing living room with floor-to-ceiling windows.
East-facing rooms get warm morning light and shift to cooler tones in the afternoon. West-facing rooms reverse that pattern, starting cool and warming up dramatically in the late afternoon. This matters especially in spaces like a home office where you sit in the same spot for hours and notice every shift in how the walls look. Choosing colors that handle those transitions gracefully is part of what a professional color consultation brings to the table.
How paint sheen changes the way a room feels
Color gets most of the attention during the selection process, but sheen has just as much impact on how a room looks and performs. The sheen you choose affects light reflection, texture visibility, and how easy the surface is to clean.
Here is how the most common interior sheens break down:
- Flat or matte absorbs light and hides surface imperfections, making it ideal for ceilings and low-traffic rooms. It is not easy to clean and shows marks quickly.
- Eggshell has a slight luster that adds depth without shine. It works well in living rooms, dining rooms, and bedrooms where you want a finished look that is still forgiving on older walls.
- Satin offers more sheen and better washability, making it a strong choice for hallways, kids’ rooms, and any area that gets regular contact.
- Semi-gloss reflects light and cleans easily, which is why it is the standard for trim, doors, baseboards, and moisture-prone areas like bathrooms and kitchens.
The sheen choice matters more than most homeowners realize, especially in Easton homes with detailed trim profiles and crown molding. Semi-gloss on trim creates a clean contrast against eggshell or satin walls, and it highlights the architectural details that give older homes their character. Getting the sheen wrong, like putting flat paint in a high-traffic hallway, leads to a surface that shows every scuff and is nearly impossible to clean without damaging the finish. Choosing the right paint finish for every room is one of the most practical decisions in the entire project.
For rooms with imperfect walls, which is most rooms in older homes, a lower sheen hides more. For rooms where durability matters, a higher sheen wins. Balancing those priorities is a conversation worth having before the first can opens.
The neutral palette is dominant for a reason
Bold accent walls had their moment, and they still work in the right setting. But the overall trend in Fairfield County, and nationally, leans heavily toward neutral palettes for a reason that goes beyond fashion.
The National Association of Realtors’ 2025 Remodeling Impact Report found that half of surveyed realtors recommend painting the entire home before listing, making it one of the single most recommended pre-sale improvements. The colors that perform best in that context are warm whites, soft greiges, and muted earth tones, shades that photograph well, feel spacious in person, and let buyers project their own taste onto the space.
Even if you are not selling, those same qualities make neutral palettes work in daily life. They adapt to furniture changes, seasonal decor swaps, and shifting light without demanding a repaint. Homeowners in Easton and neighboring towns like Ridgefield have gravitated toward this direction because the results age well. In Easton homes, where natural materials like stone fireplaces, hardwood floors, and wood beams are common, a well-chosen neutral lets those elements stand out rather than competing with the walls.
That does not mean every room needs to be beige. A soft sage green in a powder room, a deep navy on a library accent wall, or a warm charcoal on built-in cabinetry can add personality without overwhelming the space. The key is intentionality. A professional can help you identify the paint colors that complement your home’s existing elements rather than fighting them.
Surface prep that separates a lasting finish from a quick cover-up
If there is one thing that determines whether an interior paint job holds up for years or starts showing problems within months, it is preparation. Prep is not the glamorous part of a painting project. It is the part you do not see when the work is done. But it is also the part that makes everything visible, the color, the sheen, the coverage, look and perform the way it should.
In Easton, where the housing stock includes everything from 18th-century plaster walls to contemporary drywall, surface preparation varies dramatically from one project to the next. A new build might need light sanding and a single coat of primer. A home built in the 1800s might need crack repair, skim coating, and careful attention to trim joints that have shifted over decades of seasonal movement. Whether you are going for decorative finishes or a clean modern look, skipping any of these steps shows through the finish coat, sometimes immediately and sometimes a few months later when the weather changes.
Why patching and sanding are not optional steps
Every wall has imperfections. Nail holes, hairline cracks along seam tape, dents from furniture, and patches from previous repairs are all common. On older Easton homes with plaster walls, you might also find areas where the plaster has separated from the lath behind it, creating soft spots or bulges that need to be addressed before painting.
The patching process starts with identifying every defect, not just the obvious ones. A professional crew walks each room with a work light held at a low angle, which casts shadows across imperfections that normal room lighting hides. Anything that catches the light gets filled, feathered, and sanded smooth.
Sanding is the bridge between patching and painting. It creates a uniform surface texture that allows the primer and topcoat to bond evenly. Without it, patched areas absorb paint differently than the surrounding wall, creating visible marks called “flashing” that show up as dull or shiny spots in the finished coat. On previously painted surfaces, a light scuff sand also removes the glossy skin that prevents new paint from gripping.
The prep and repair process for interior walls looks different in every home, but the principle is the same. Every minute spent on preparation saves hours of frustration after the paint dries.
Priming is not just an extra coat of paint
Homeowners sometimes ask whether primer is necessary, especially when using premium paint that claims paint-and-primer-in-one coverage. The short answer is that primer does something topcoat paint cannot, no matter how good the product is.
Primer serves three functions that matter for interior painting:
- It seals porous surfaces so the topcoat absorbs evenly across the entire wall. Without it, patches, bare drywall, and repaired areas soak up more paint than the surrounding surface, creating uneven color and sheen.
- It blocks stains from bleeding through the finish. Water stains, smoke residue, tannin bleed from wood knots, and old marker or crayon marks will ghost through even two coats of premium paint if they are not sealed first.
- It creates a bonding layer between the old surface and the new paint, especially important on glossy or slick surfaces where topcoat alone might not adhere well.
On new drywall, a PVA primer seals the paper face and joint compound so the topcoat looks consistent. On stain-prone areas, a shellac-based primer locks in discoloration. On previously glossy surfaces, a bonding primer gives the new paint something to grip. Each situation calls for a different product, and choosing the wrong one, or skipping it entirely, compromises the result. Understanding the difference between primer and paint helps explain why this step exists in the first place.
The U.S. EPA notes that paints and coatings are among the most common sources of volatile organic compounds in indoor environments, with indoor VOC concentrations reaching two to five times higher than outdoor levels. Choosing low-VOC or zero-VOC paints reduces that exposure, which is especially relevant in rooms where the windows stay closed for much of the year. Greenhaus Painting works with premium products from Benjamin Moore and Sherwin-Williams, both of which offer extensive low-VOC lines.
Lead paint considerations in older Easton homes
Any discussion of interior painting prep in a town like Easton has to address lead. Homes built before 1978 may have lead-based paint somewhere in the structure, often buried under multiple layers of newer paint. As long as that paint is intact and undisturbed, it is generally not considered a hazard. But the moment you sand, scrape, or otherwise disturb a surface that contains lead paint, you create dust and particles that pose a real health risk.
The Connecticut Department of Public Health advises homeowners working on pre-1978 homes to familiarize themselves with lead-safe work practices, including using personal protective equipment, containment barriers, and proper cleanup methods. For professional painting contractors, EPA’s RRP rule requires certification, trained workers, and specific lead-safe procedures whenever the work disturbs more than six square feet of interior painted surface in a pre-1978 home.
This is one of the clearest arguments for hiring a professional crew when repainting an older Easton home. A certified team knows how to evaluate surfaces, contain work areas, and manage lead dust in ways that protect both the household and the workers. It is not a step to shortcut, and it is not something most homeowners are equipped to handle on their own.
What to expect from a professional interior painting project
Hiring a painting crew feels straightforward until you start getting estimates and realize how differently companies approach the same job. The range in pricing, process, and communication quality across painters in Fairfield County is wide. Understanding what a well-run project looks like helps you evaluate proposals, ask the right questions, and avoid the kind of experience that leaves you regretting the hire.
A quality interior painting project follows a predictable sequence, and each phase matters. Skipping or rushing any step shows up in the finished product. Here is what the process looks like when it is done right.
The estimate visit sets the tone
A good painting estimate is not a quick walkthrough with a tape measure and a number emailed later that afternoon. It is a conversation about what you want the project to accomplish, what the surfaces actually need, and how the work will fit into your household schedule.
During the estimate, the painter should evaluate every surface being painted, not just glance at the walls. That includes checking trim condition, looking for stains or damage that need special treatment, noting areas where previous paint is failing, and identifying anything that might affect the timeline or cost. In Easton homes with detailed woodwork or older plaster walls, that evaluation takes longer because there is simply more to assess.
You should walk away from the estimate visit with a clear sense of what is included. A defined scope that spells out which rooms, which surfaces (walls, trim, ceilings, doors), what prep work is part of the service, and what product system will be used gives you something concrete to compare against other proposals. Understanding how painting costs are determined helps you evaluate whether a proposal is realistic or missing key steps. If a proposal is vague, that vagueness usually shows up in the work.
The estimate is also your chance to evaluate communication style. A crew that communicates clearly before the project starts is far more likely to communicate clearly during it. The opposite is also true.
Protection, prep, and the work itself
Once a project begins, the first thing that should happen is protection. Floors, furniture, fixtures, and anything that is not being painted gets covered or moved. This sounds basic, but the quality of protection separates professional crews from the ones that leave paint splatter on your hardwood and dust on your countertops. Knowing what to expect on paint day helps you prepare your home and set realistic expectations for the timeline.
After protection comes the prep work discussed earlier: patching, sanding, priming, caulking, and masking. A room-by-room preparation guide can help you understand what your painter handles and what you might want to do in advance. In a typical Easton home, prep can account for a significant portion of the total project time. That is normal and expected. A crew that jumps straight to rolling paint without spending time on preparation is cutting corners you will pay for later.
The painting itself follows a specific order that ensures clean results:
- Ceilings first, working from the top of the room down so any drips or splatter land on surfaces that have not been finished yet.
- Walls next, starting with cut-in work along edges, corners, and around trim, then rolling the field for consistent coverage.
- Trim, doors, and detail work last, using appropriate brushes and techniques for the profile and sheen.
Between coats, proper dry time matters. Rushing a second coat before the first has cured leads to dragging, uneven texture, and poor adhesion. Two well-applied coats with adequate dry time between them are the standard for a finish that lasts.
For homeowners curious about coverage, a paint calculator can help estimate how much product a project requires, though your painter will handle the actual measurements during the estimate.
The walkthrough is where standards show
The end of the project should not be the moment the crew packs up the van. It should be a structured walkthrough where you and the painter review every surface together, in good lighting, and confirm that the work meets the agreed-upon standard.
A proper walkthrough covers wall coverage and consistency, clean cut-in lines along ceilings and trim, even sheen across surfaces, trim and door finish quality, and cleanup of the work area. If anything needs a touch-up, it gets addressed before the crew leaves. Whether the project is in Easton or across the county in Stamford, this is the final quality gate, and it is one of the most reliable indicators of a company that stands behind its work.
Greenhaus Painting closes every project with a detailed final walkthrough and backs the work with an all-inclusive warranty and 100% satisfaction guarantee with no fine print. That structure exists because a finish you can see up close, in natural light, with nothing to hide behind, is the standard that matters.
Protecting your investment after the paint dries
A professional interior paint job in an Easton home represents a real investment of time and money. Protecting that investment does not require much effort, but it does require some awareness of how paint performs in a living environment over time.
The first few weeks after a project finishes are the most important for the long-term durability of the finish. After that initial curing period, a few simple habits keep your walls, trim, and ceilings looking fresh much longer than neglect allows.
The curing window matters more than you think
Paint feels dry to the touch within hours. It reaches a point where you can carefully hang items within a day or two. But full chemical curing, the process where the paint film reaches its maximum hardness and durability, takes longer. For latex paints, that window is typically two to four weeks depending on humidity and temperature.
During that curing period, avoid washing or scrubbing the walls. Do not press tape against freshly painted surfaces for hanging decorations. Be careful placing furniture directly against walls, because the paint can transfer or mark until it has fully hardened. If you need to clean a spot, a damp cloth with light pressure is the safest approach until the cure is complete.
Humidity speeds or slows the curing process. In a well-ventilated Easton home during the warmer months, paint cures faster. During winter, when windows are closed and heating systems pull moisture out of the air, the process can take a bit longer. Running a fan or opening a window in a freshly painted room, even briefly, helps move the process along.
Most homeowners do not think about curing because the paint looks done. But respecting that window prevents the kind of marks and damage that send people back for touch-ups much sooner than necessary. If your walls are already showing signs of fading, the issue is usually UV exposure or poor product choice rather than anything that happened during curing.
Routine cleaning that keeps walls looking new
Once the paint has fully cured, cleaning is straightforward. For most interior walls painted in eggshell or satin, a soft cloth or sponge dampened with water handles everyday dust and smudges. For heavier marks, a solution of warm water and a small amount of mild dish soap works without damaging the finish.
A few cleaning guidelines help avoid problems:
- Always test a cleaning method in an inconspicuous area first, especially on flat or matte finishes that are more sensitive to scrubbing.
- Wring the cloth or sponge thoroughly before touching the wall. Excess water can seep behind paint at seams or edges and cause bubbling.
- Avoid abrasive cleaners, magic erasers (which are micro-abrasives), and solvent-based products on painted walls. They dull the sheen and can remove color.
- Clean from the bottom of a drip up, not from the top down. Starting at the top lets dirty water run down the clean wall, leaving streak marks that are harder to remove.
Trim painted in semi-gloss is more forgiving. It handles cleaning well, which is one reason it is the standard for baseboards, casings, and doors. A quick wipe-down of high-touch areas like door frames and light switch plates every few weeks keeps the finish looking sharp.
If you are dealing with water stain damage on ceilings or walls, that usually signals an underlying moisture issue that cleaning alone will not solve. The same goes for peeling paint in bathrooms where humidity is breaking down the existing finish. Addressing the source first, then repainting with the right product and prep, prevents the same problem from coming back.
Touch-ups and when to call it a full repaint
Even a well-maintained paint job eventually needs attention. The question is whether a touch-up will do or whether it is time for a full repaint.
Touch-ups work best when the existing paint is still in good overall condition and the damage is isolated. A small scuff in a hallway, a chip behind a door, or a nail hole repair after moving art can all be addressed with leftover paint and a small brush. The key to a seamless touch-up is using the same paint (same color, same sheen, same product) and feathering the edges so the repair blends into the surrounding surface.
There are situations where touch-ups stop being practical:
- The surrounding paint has faded noticeably from UV exposure, so even a perfect color match looks different against the aged wall.
- Multiple areas across the room need attention, and the cumulative touch-ups would be visible as patches.
- The existing finish is failing (cracking, peeling, or losing adhesion), which means spot repairs will not last because the underlying surface is compromised.
- You have changed the room’s lighting, flooring, or furnishings enough that the current color no longer works.
When touch-ups start feeling like a temporary fix for a bigger issue, it is usually time for a full-service repaint. In some cases, a coating restoration approach that addresses specific failing areas before full repainting can extend the life of the existing finish. But repainting the entire room or floor at once gives you consistent color, uniform sheen, and a fresh prep foundation that resets the clock on the next repaint cycle.
Conclusion
Interior painting in Easton, CT is more than a cosmetic update. It is a way to protect your home’s surfaces, restore rooms that have lost their energy, and make the spaces where you spend the most time feel intentional again. From historic Colonials along Black Rock Turnpike to contemporary homes off Center Road, every Easton property has its own surface conditions, light patterns, and finish expectations that shape how a paint project should be approached.
The difference between a paint job that lasts and one that disappoints comes down to preparation, product selection, and the crew doing the work. Shortcuts in any of those areas show through, sometimes immediately and sometimes a season or two later when the finish starts to fail. Investing in a process built around clean prep, the right primers and topcoats, and clear communication gives you results that hold up under daily life and Connecticut’s demanding climate.
If you are ready to refresh your home’s interior, Greenhaus Painting serves Easton and Fairfield County with a prep-first approach, premium products from Benjamin Moore and Sherwin-Williams, and a detailed final walkthrough on every project. Reach out for a free estimate and see what a professional repaint can do for your home.